6.7 KiB
SSH Authentication with G Suite
This guide will cover how to configure G Suite to issue SSH credentials to specific groups of users. When used in combination with role based access control (RBAC) it allows SSH administrators to define policies like:
- Only members of "DBA" Google group can SSH into machines running PostgreSQL.
- Developers must never SSH into production servers.
- ... and many others.
!!! warning "Version Warning"
This guide requires an enterprise version of Teleport 4.1.4 or greater. The open source
edition of Teleport only supports [Github](admin-guide.md#github-oauth-20) as
an SSO provider.
Prerequisites:
Before you get started you’ll need:
- An Enterprise version of Teleport v4.1.4 or greater, downloaded from https://dashboard.gravitational.com/.
- Be a G Suite Super Admin. As Google Best Practices, we would recommend setting up a seperate super admin with 2FA vs using your user.
- e.g. A dedicated account ben-ops@practice.io vs my daily ben@practice.io
- Ability to create GCP Project.
- This might require signing up to GCP, but for this project it won’t require using any paid services. It’s just a side effect of G Suite and GCP being closely related.
- Have a verified Domain.
- Setup G Suite Groups
Configure G Suite
-
Obtain OAuth 2.0 credentials https://developers.google.com/identity/protocols/OpenIDConnect
-
Create a new Project.
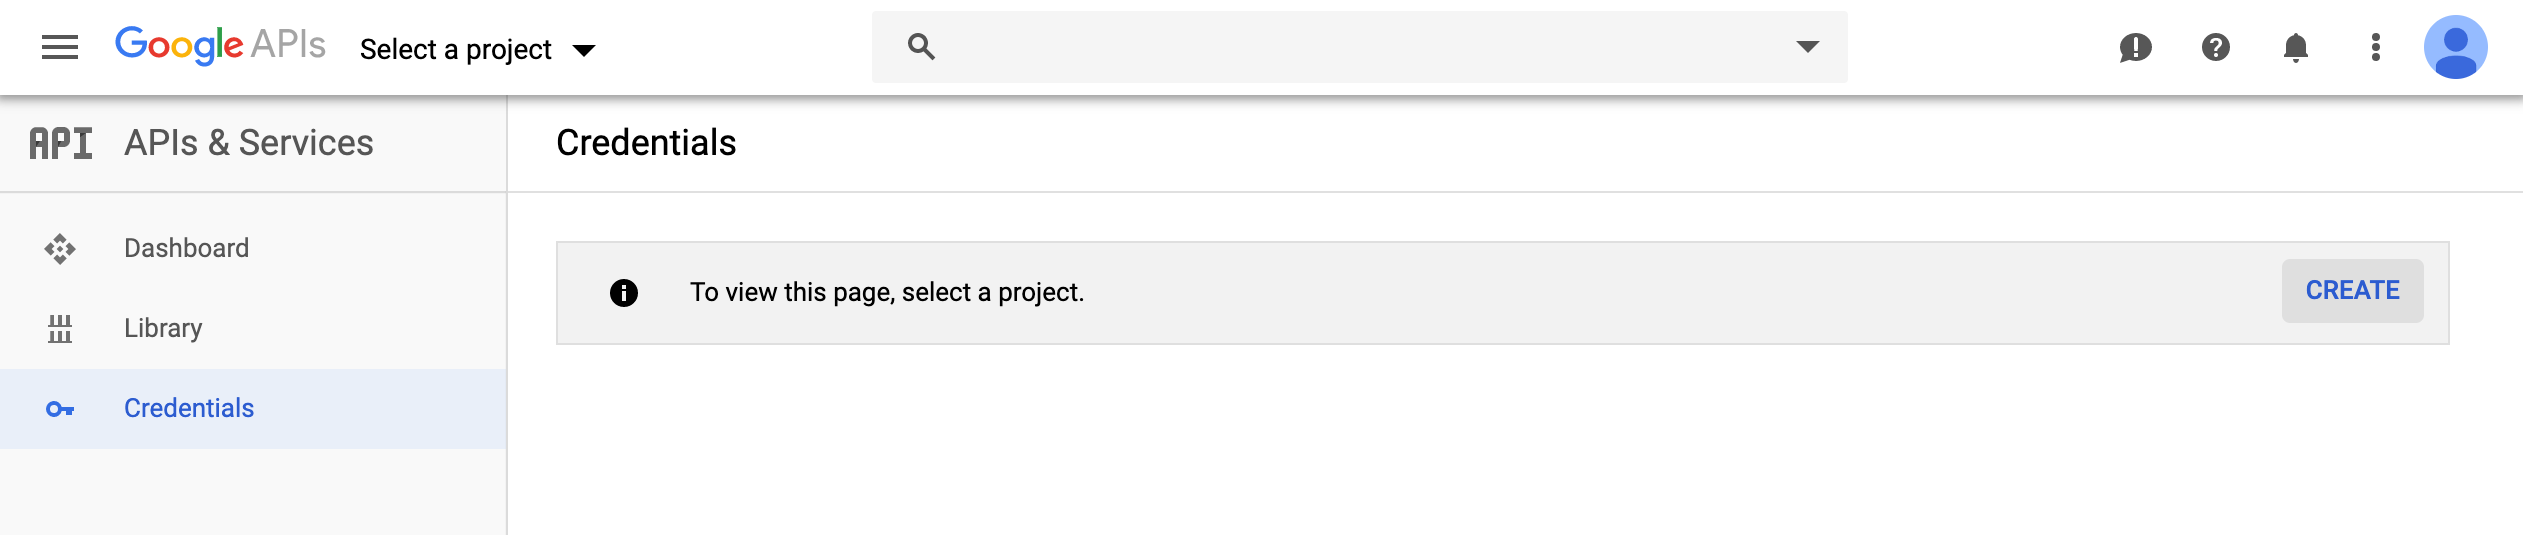
-
Select OAuth client ID.
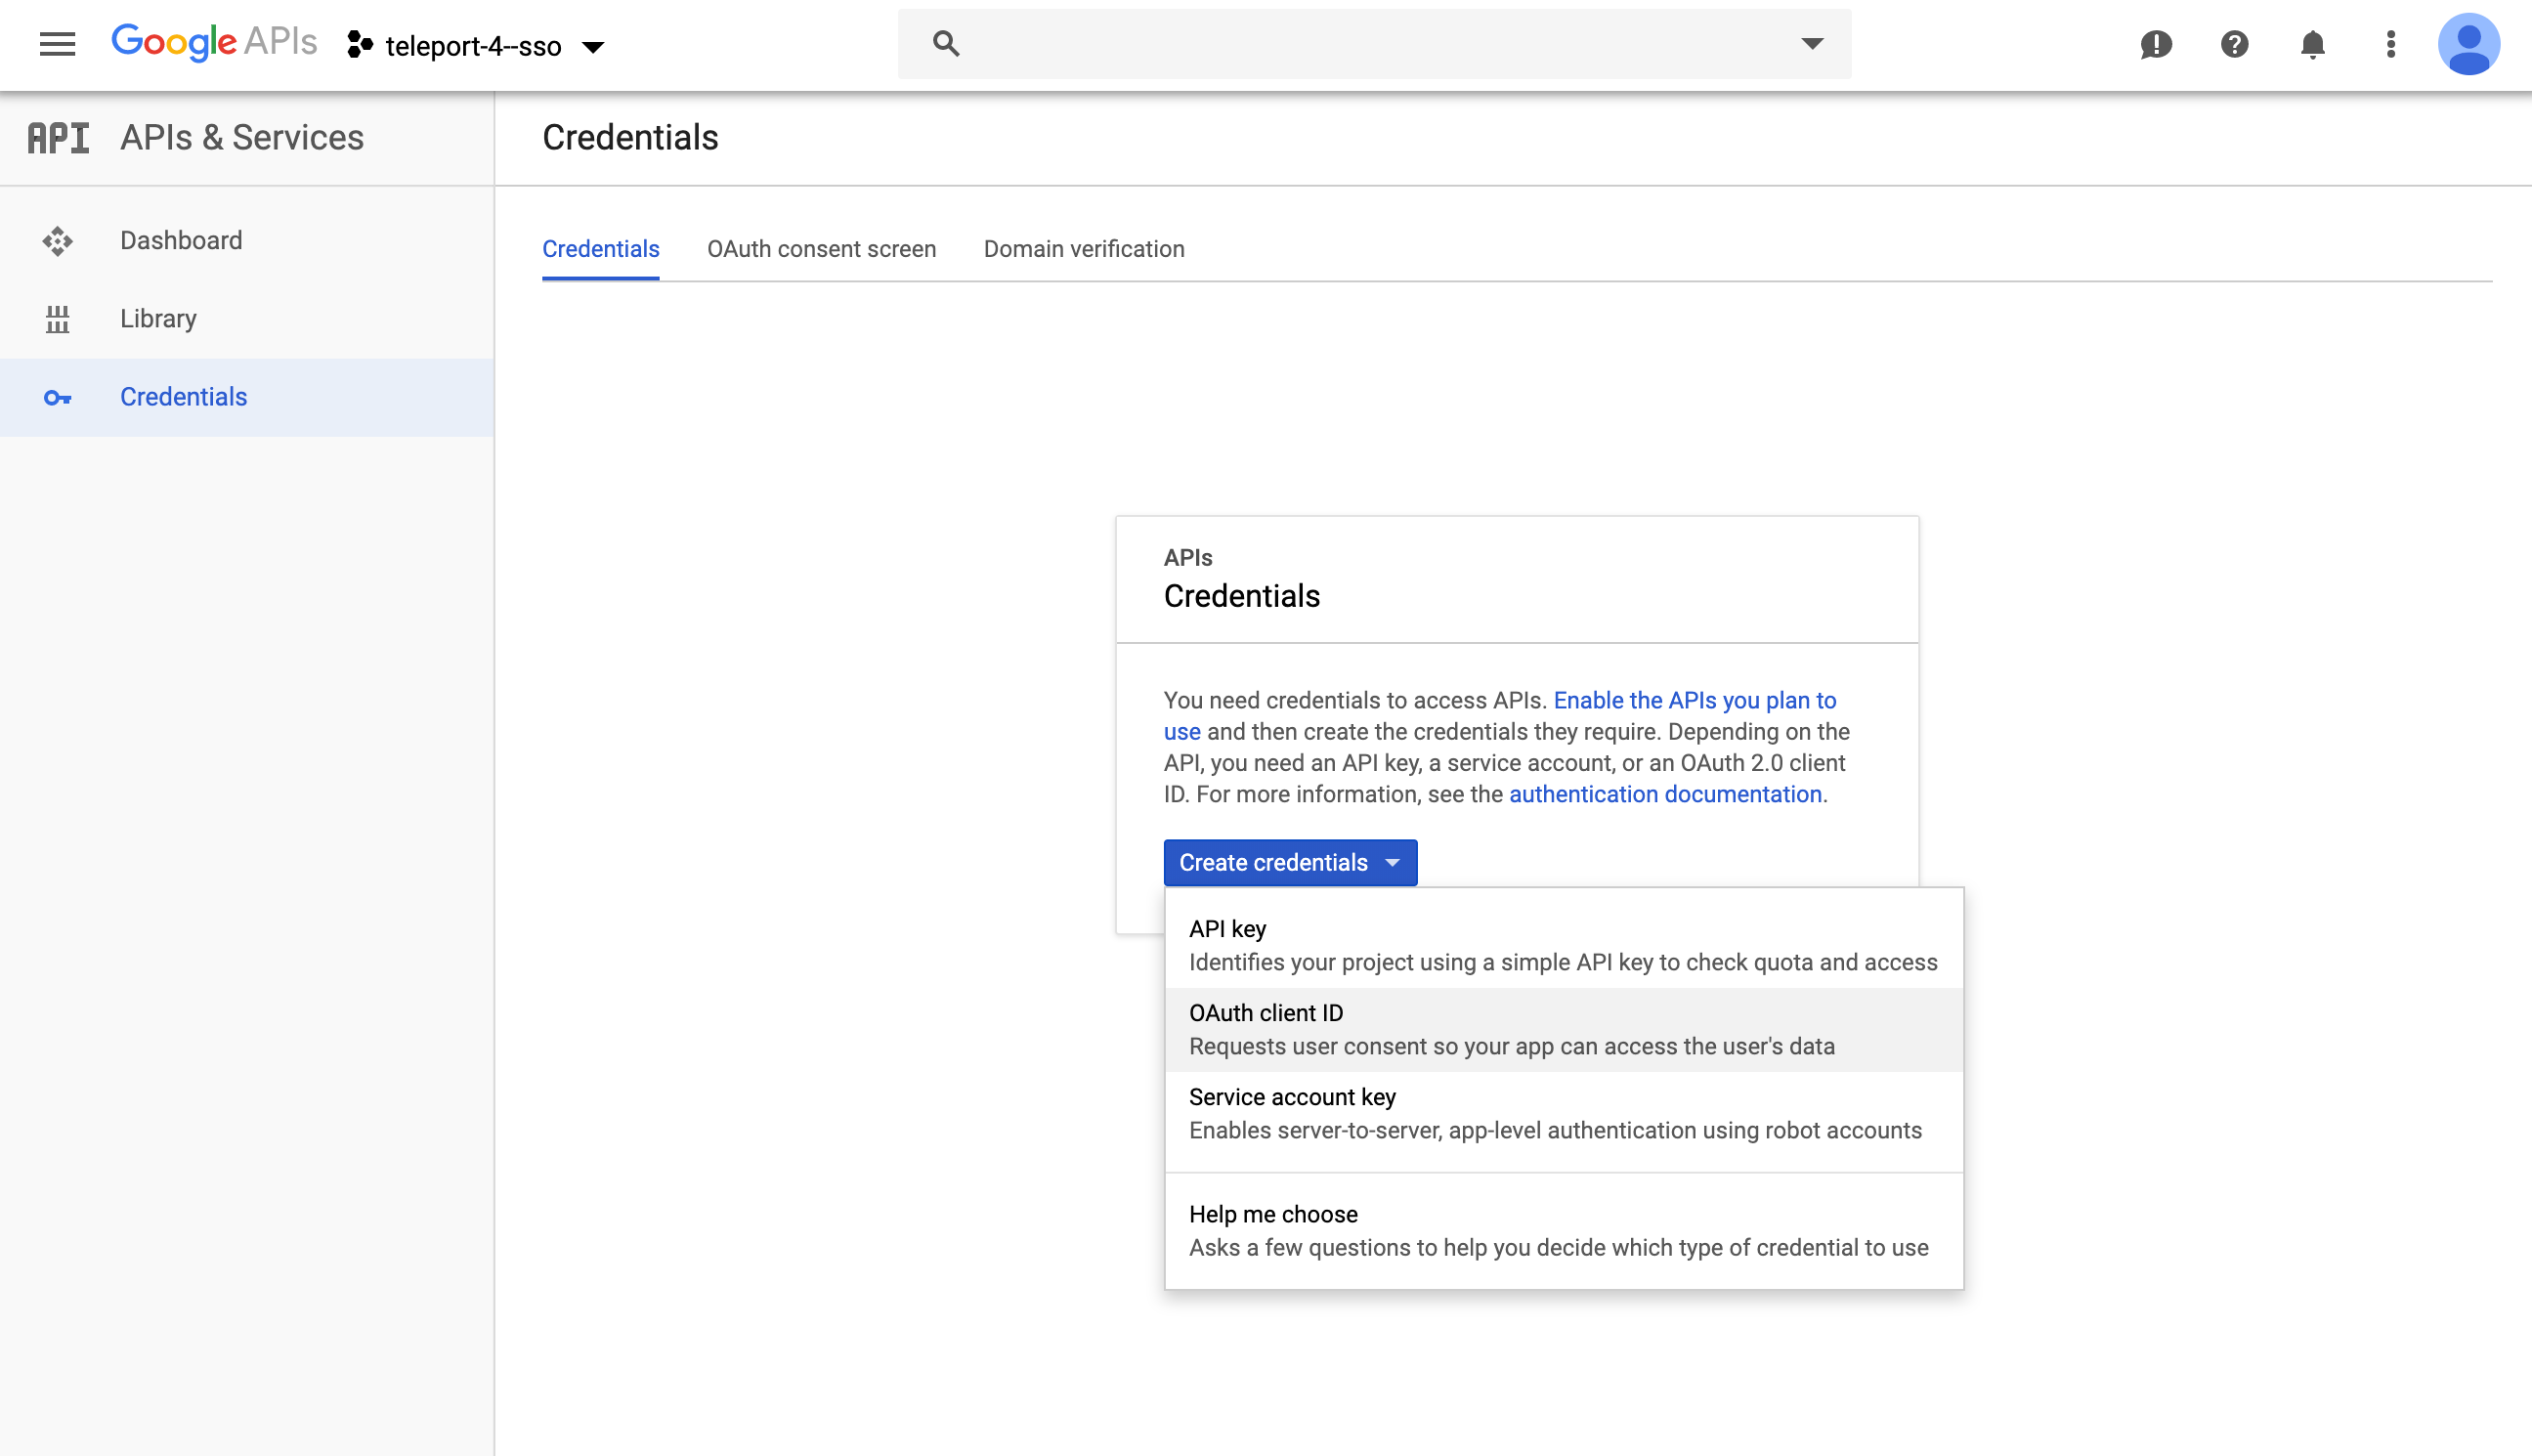
-
Make Application Type Public & Setup Domain Verification
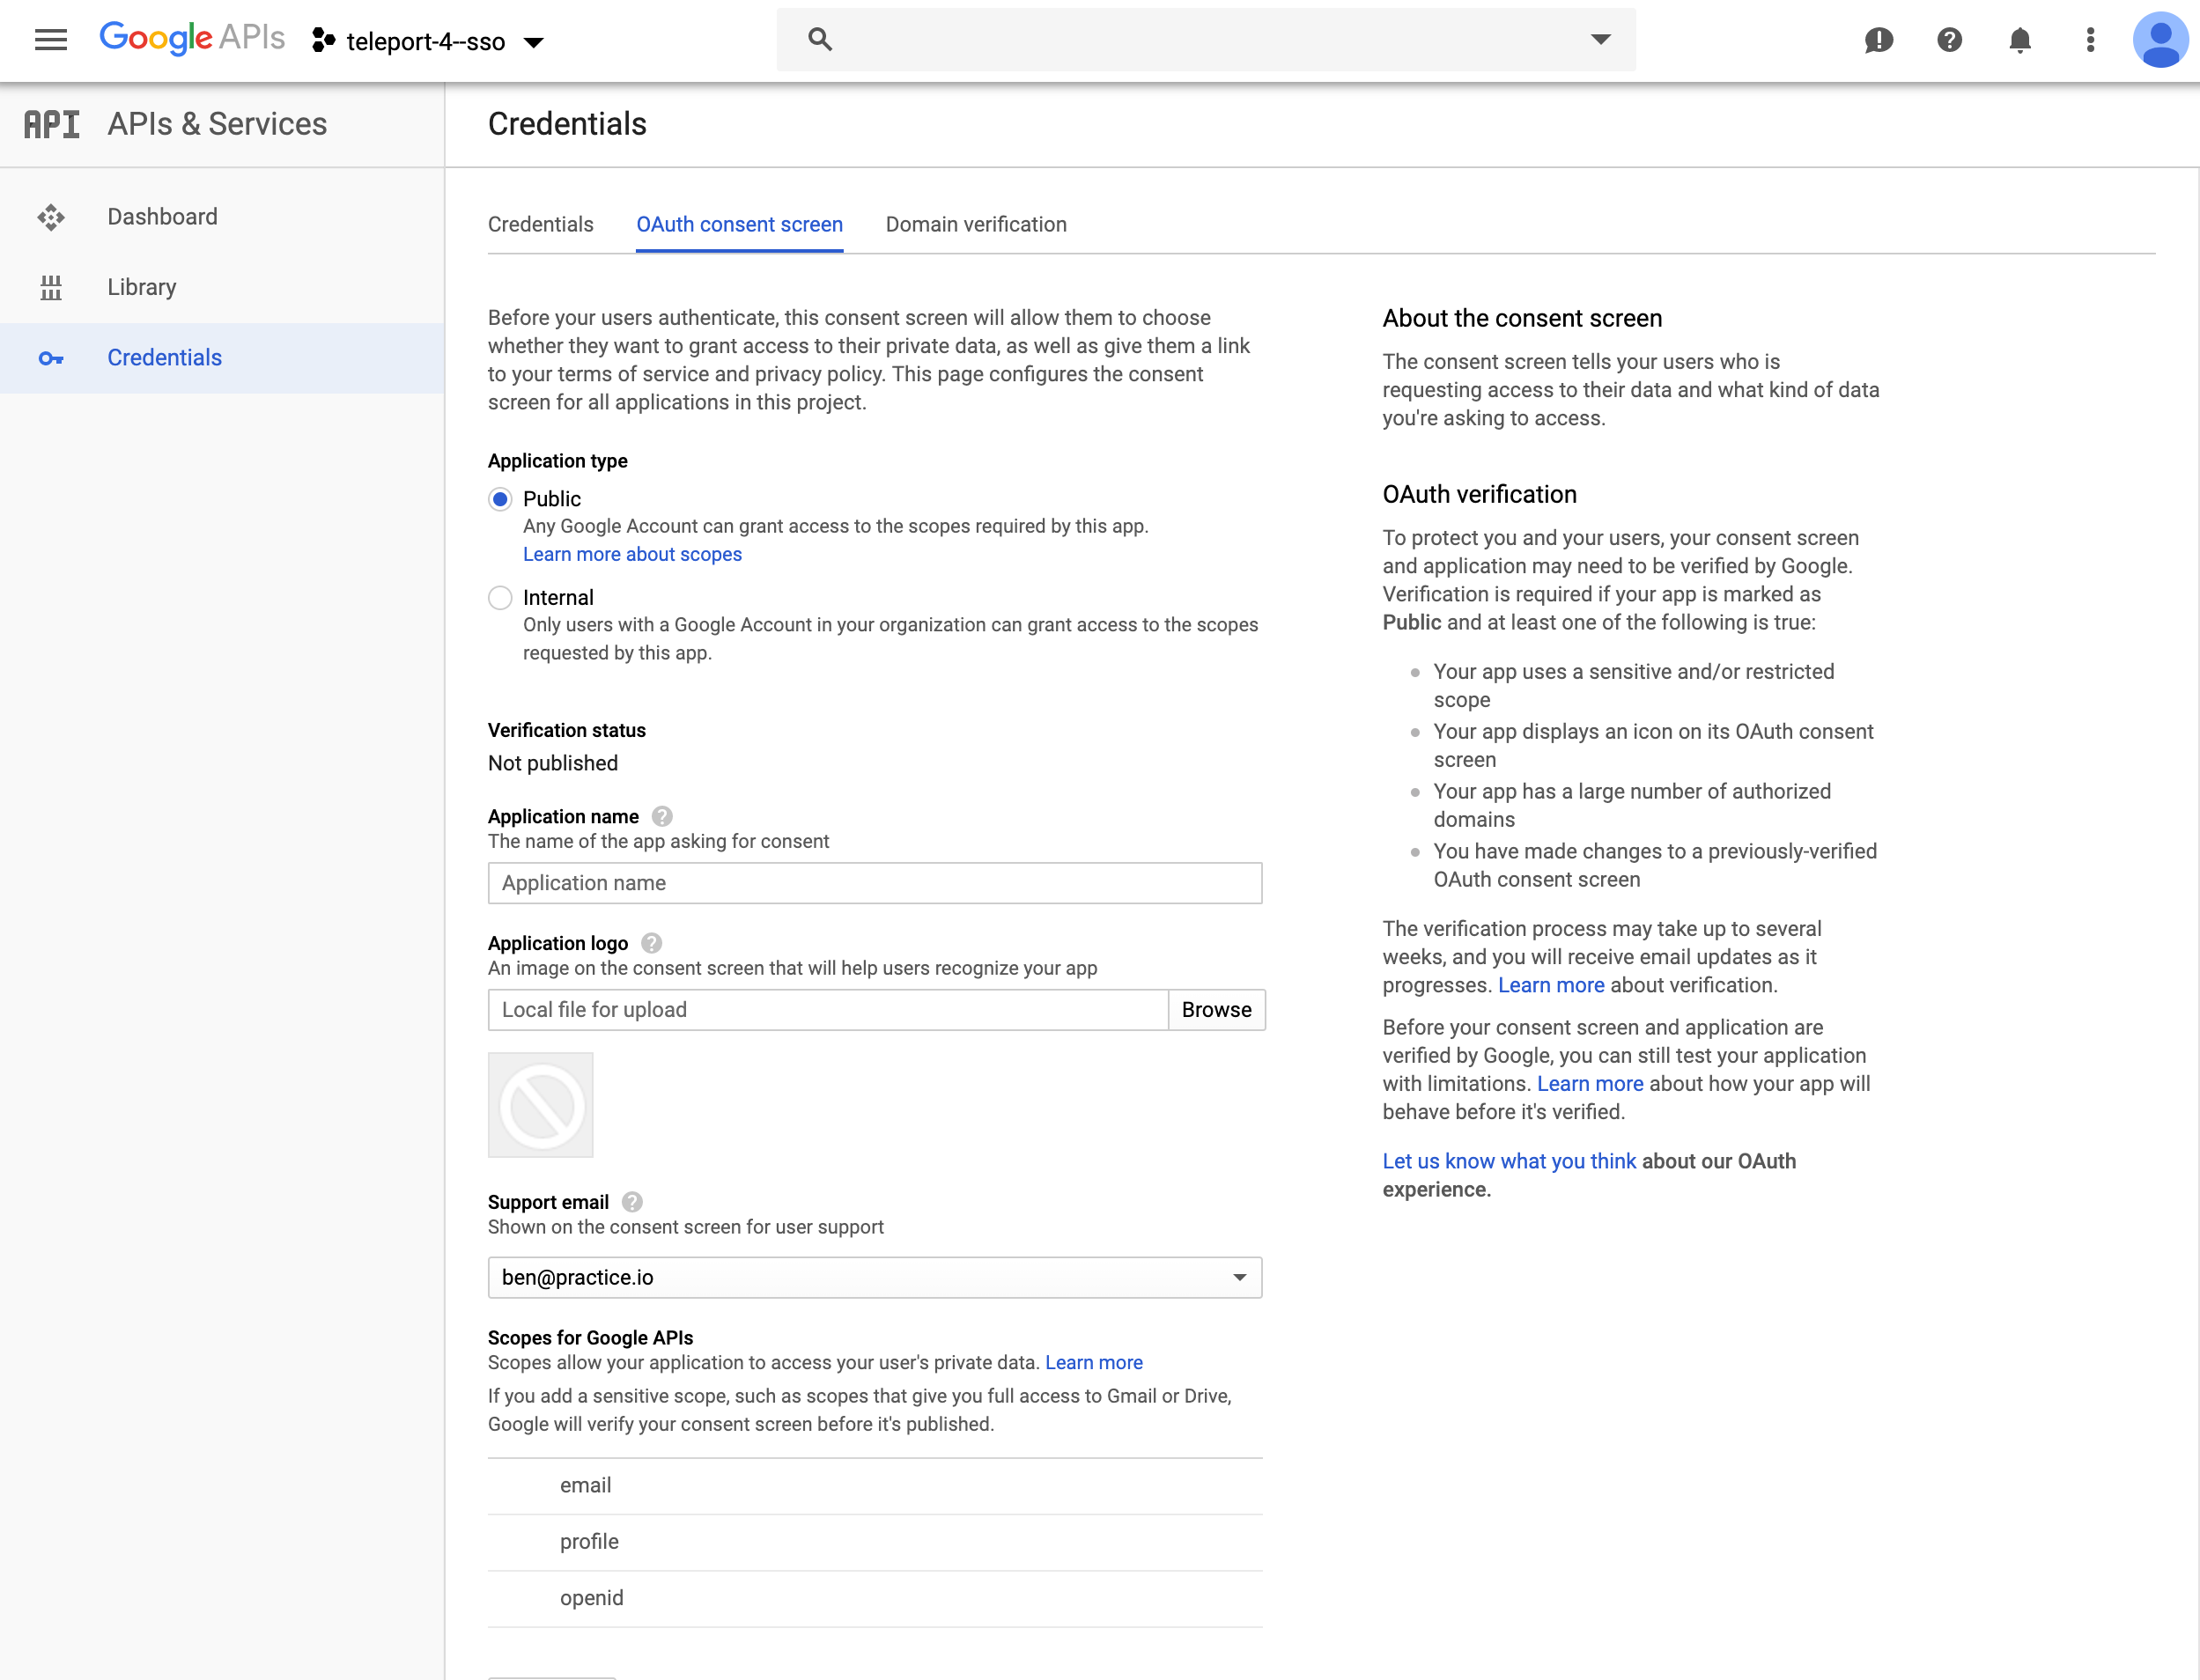
-
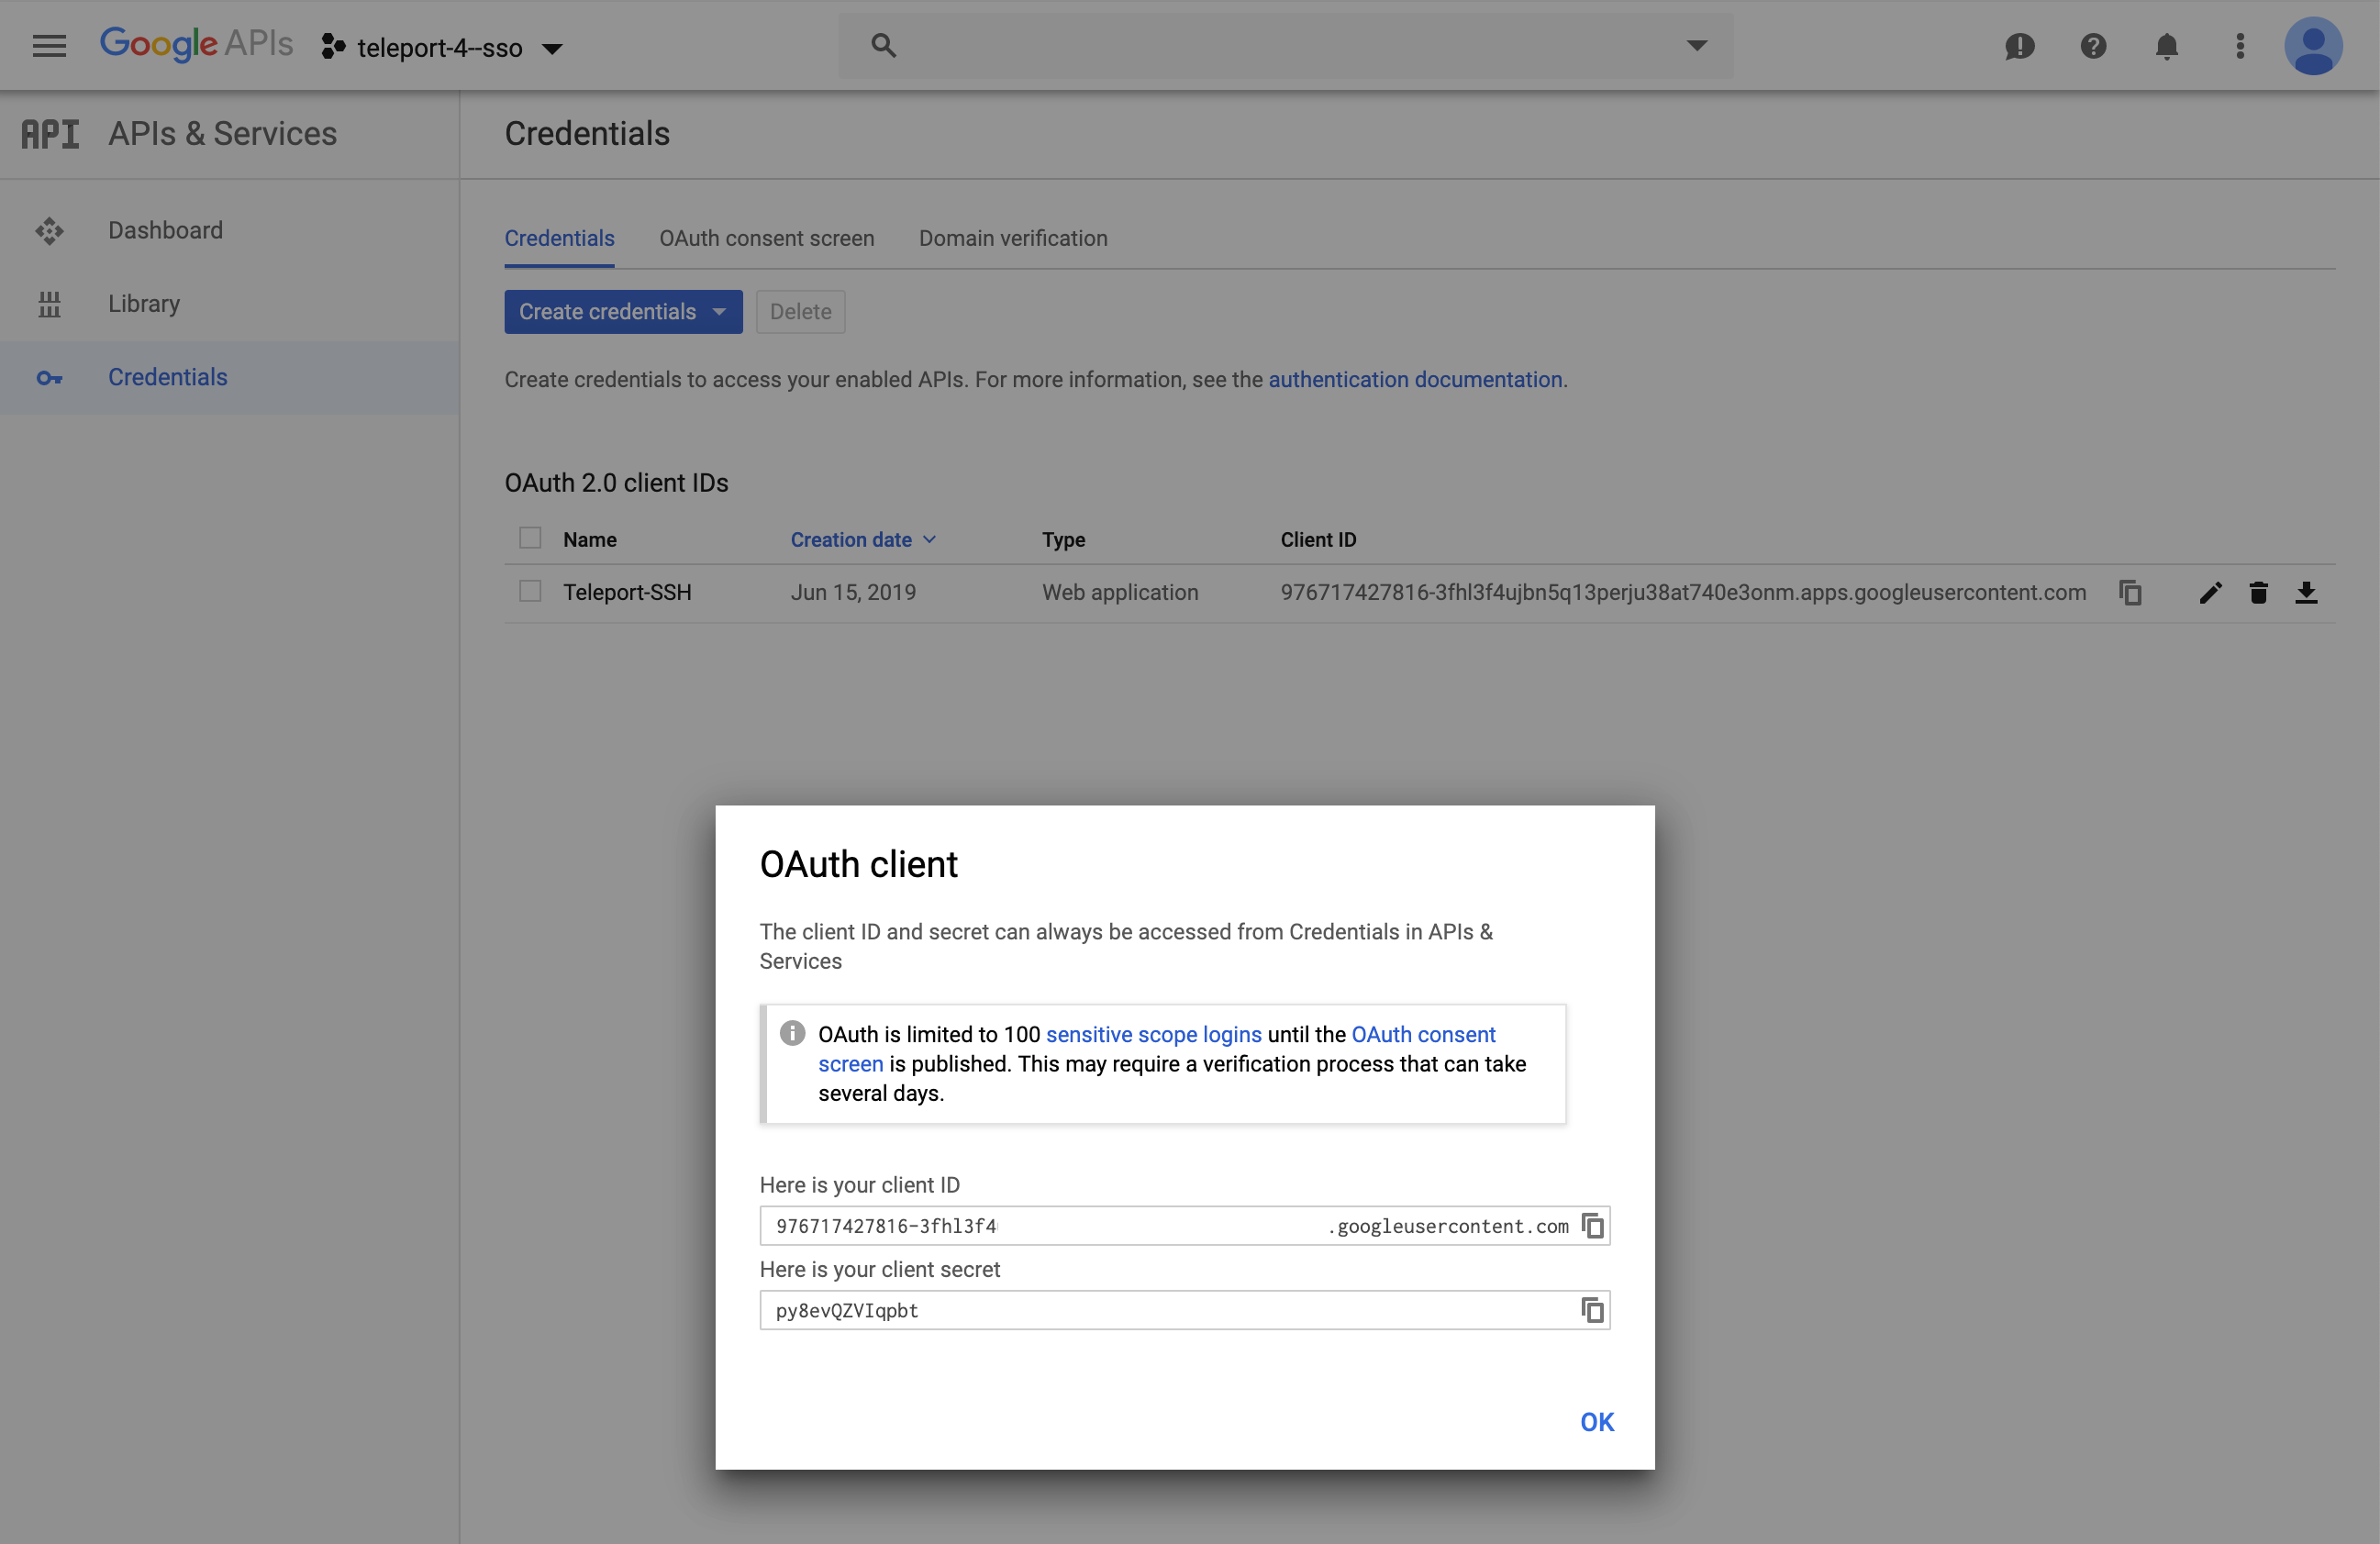
Copy OAuth Client ID and Client Secret for YAML Below. Note: The redirect_url:
https://teleport.example.com:3080/v1/webapi/oidc/callback
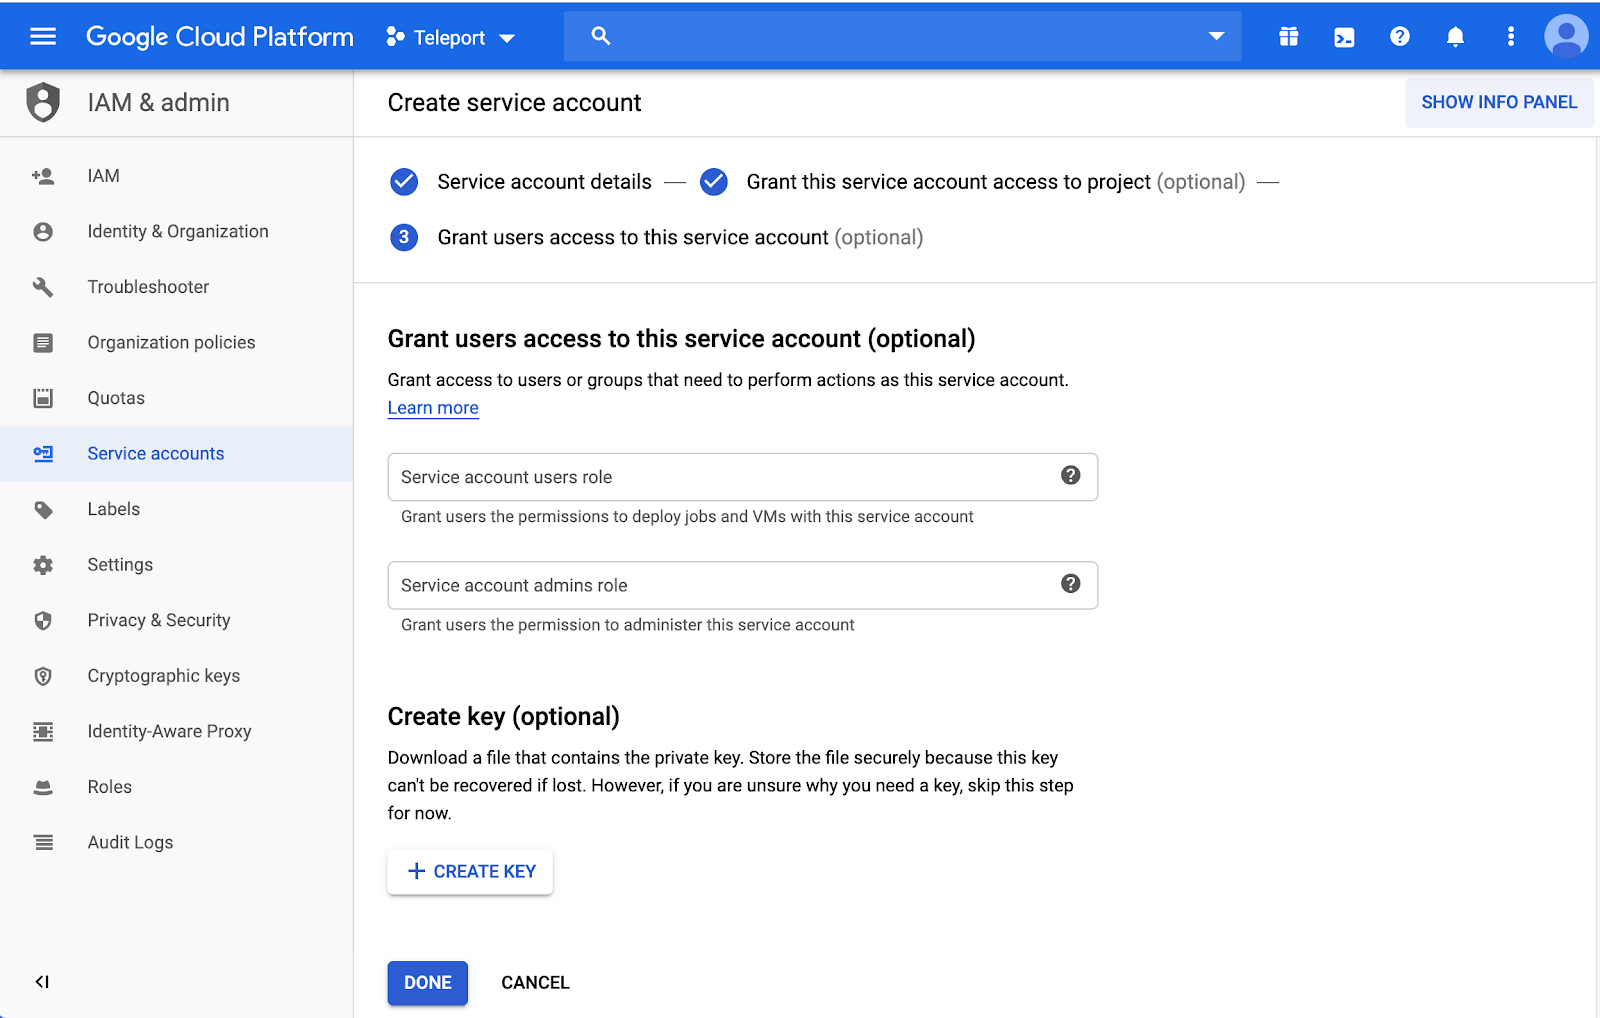
Create a Service Account
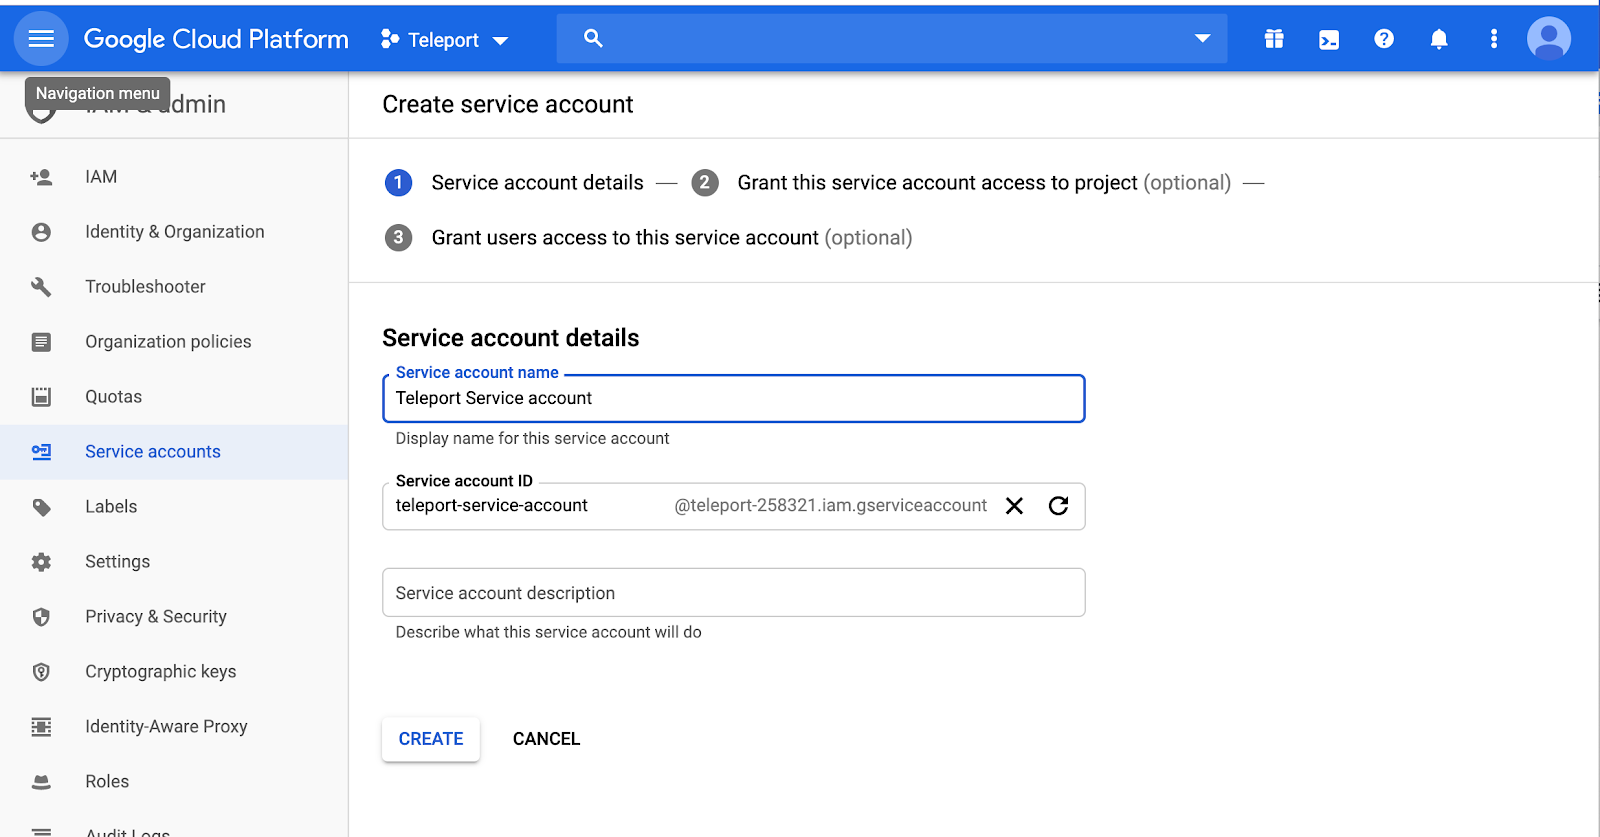 Leave Service account users roles, and admin roles as blank.
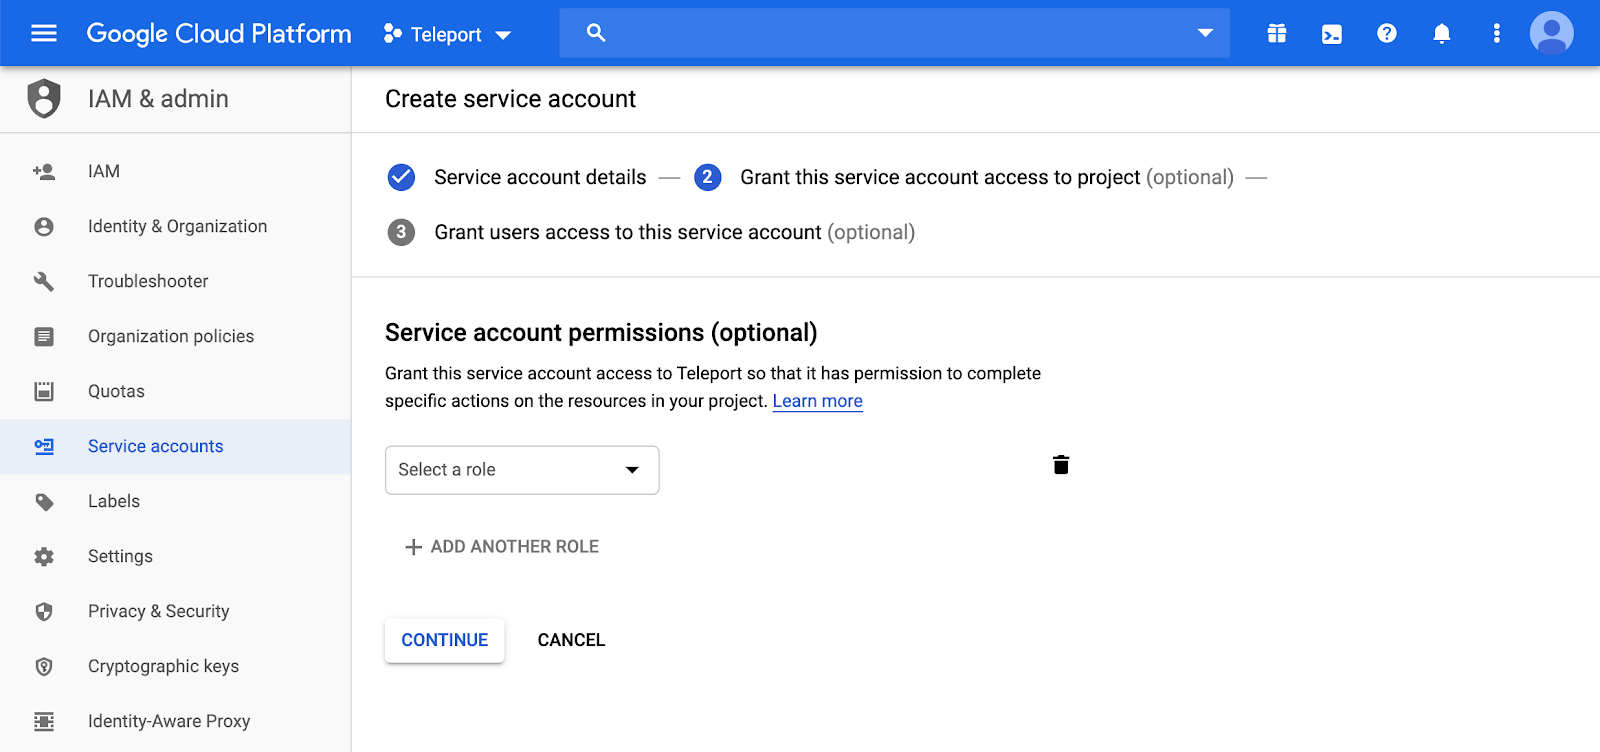
 Leave Service account permissions as blank.
Enable Account Delegation:


Download Service Account JSON
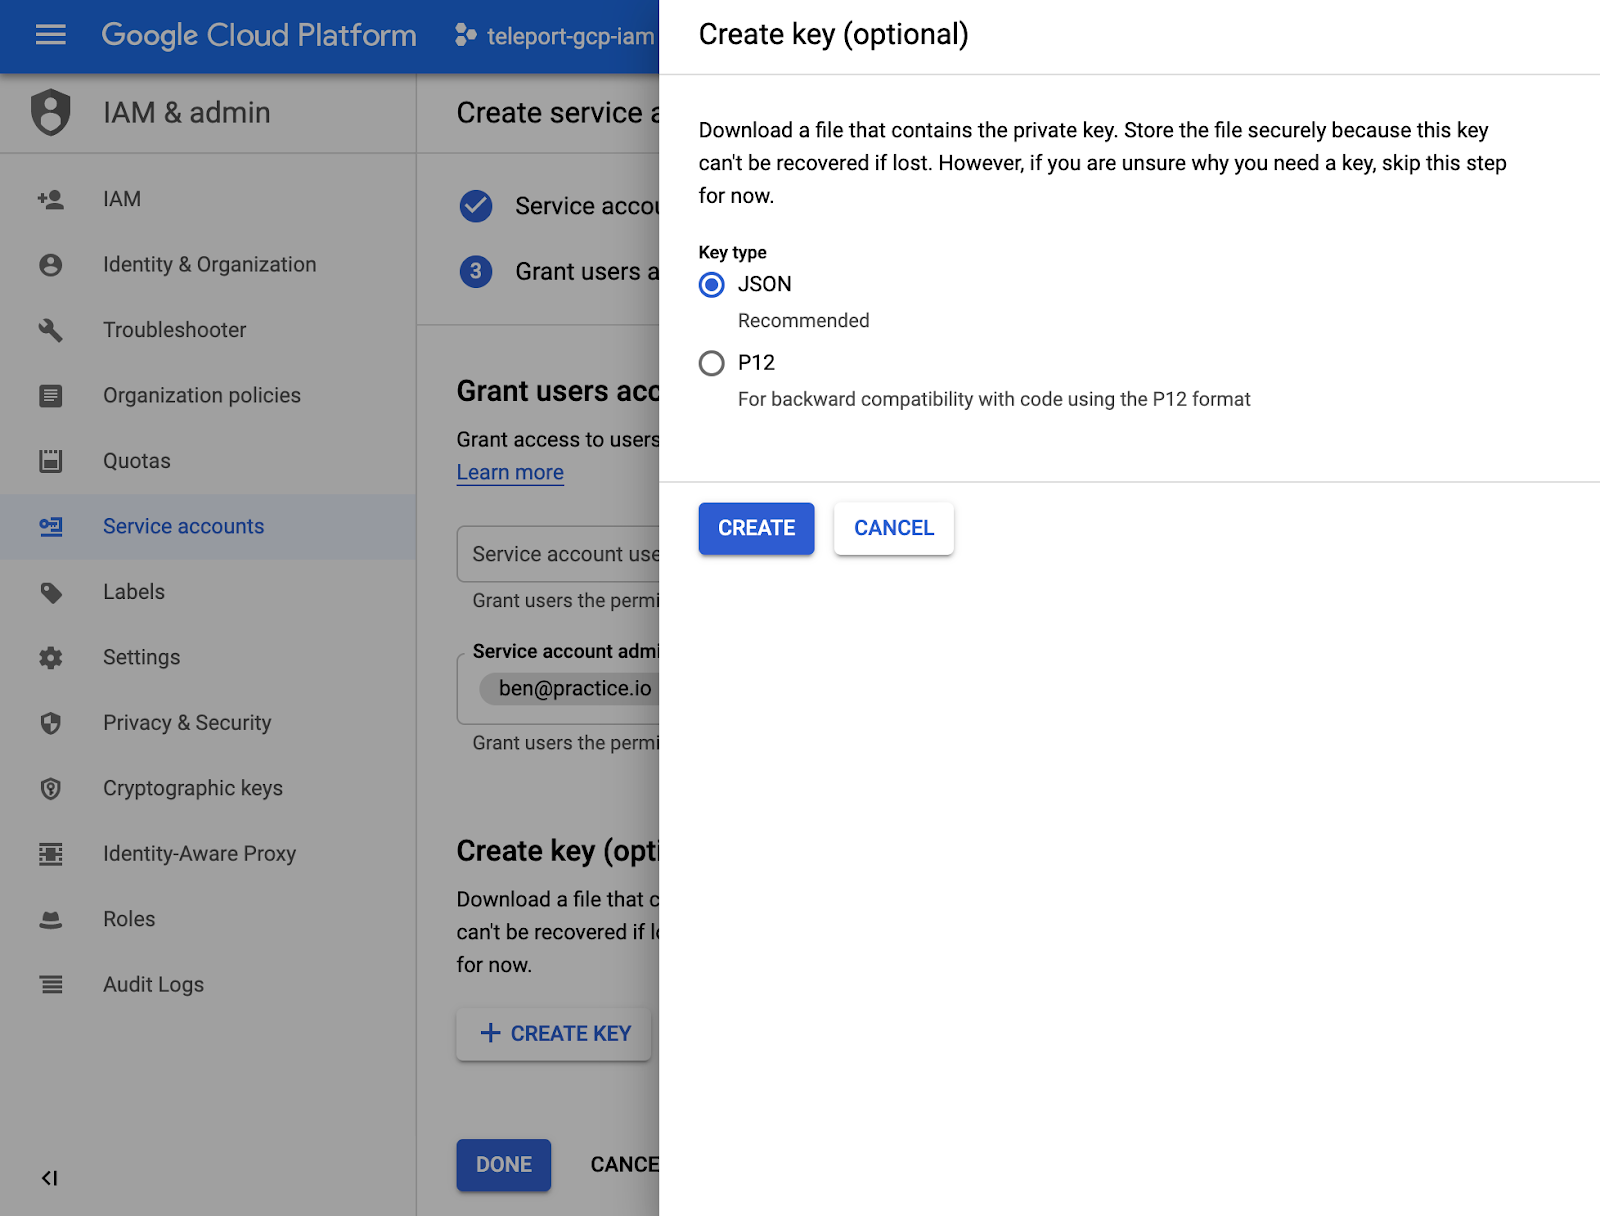
This JSON file will need to be uploaded to the Authentication server, and will be later referenced by
the OIDC Connector, under google_service_account_uri.
!!! note
Teleport requires the service account JSON to be uploaded to all Teleport authentication servers when setting
up in a HA config.
API Scopes:
Client name: Use Email from Service account creation ( this will be converted to numbers after it’s authorized )
https://www.googleapis.com/auth/admin.directory.group.member.readonly, https://www.googleapis.com/auth/admin.directory.group.readonly, https://www.googleapis.com/auth/admin.directory.user.readonly
 Once saved, Google with convert the Client Name into the Client ID.

Create a OIDC Connector
Now, create a OIDC connector resource.
Write down this template as gsuite-connector.yaml:
kind: oidc
metadata:
  name: gsuite
spec:
  claims_to_roles:
  - claim: groups
    roles:
    - admin
    value: dev@practice.io
  client_id: GSUITE_CLIENT_ID.apps.googleusercontent.com
  client_secret: OAUTH_CLIENT_SECRET
  display: G Suite Group
  google_admin_email: GSUITE_EMAIL
  google_service_account_uri: file:///var/lib/teleport/gsuite-creds.json
  issuer_url: https://accounts.google.com
  redirect_url: https://TELEPORT_PROXY:3080/v1/webapi/oidc/callback
  scope:
  - openid
  - email
version: v2
Create the connector using tctl tool:
$ tctl create gsuite-connector.yaml
Create Teleport Roles
We are going to create 2 roles:
- Privileged role admin who is able to login as root and is capable of administrating the cluster
- Non-privileged dev
kind: role
version: v3
metadata:
  name: admin
spec:
  options:
    max_session_ttl: 24h
  allow:
    logins: [root]
    node_labels:
      "*": "*"
    rules:
      - resources: ["*"]
        verbs: ["*"]
Devs are only allowed to login to nodes labelled with access: relaxed
Teleport label. Developers can log in as either ubuntu or a username that
arrives in their assertions. Developers also do not have any rules needed to
obtain admin access to Teleport.
kind: role
version: v3
metadata:
  name: dev
spec:
  options:
    max_session_ttl: 24h
  allow:
    logins: [ "{{external.username}}", ubuntu ]
    node_labels:
      access: relaxed
Notice: Replace ubuntu with linux login available on your servers!
$ tctl create admin.yaml
$ tctl create dev.yaml
Testing
The Web UI will now contain a new button: "Login with GSuite". The CLI is the same as before:
$ tsh --proxy=proxy.example.com login
This command will print the SSO login URL (and will try to open it automatically in a browser).
!!! tip "Tip"
Teleport can use multiple OIDC connectors. In this case a connector name
can be passed via `tsh login --auth=connector_name`
Troubleshooting
If you get "access denied" errors the number one place to check is the audit
log on the Teleport auth server. It is located in /var/lib/teleport/log by
default and it will contain the detailed reason why a user's login was denied.
Example of a user being denied due as the role clusteradmin wasn't setup.
{"code":"T1001W","error":"role clusteradmin is not found","event":"user.login","method":"oidc","success":false,"time":"2019-06-15T19:38:07Z","uid":"cd9e45d0-b68c-43c3-87cf-73c4e0ec37e9"}
Some errors (like filesystem permissions or misconfigured network) can be
diagnosed using Teleport's stderr log, which is usually available via:
$ sudo journalctl -fu teleport
If you wish to increase the verbosity of Teleport's syslog, you can pass the
--debug flag to teleport start command.