13 KiB
| title | description |
|---|---|
| Teleport Quick Start | The quick start guide for how to set up modern SSH access to cloud or edge infrastructure. |
Teleport Quick Start
This tutorial will guide you through the steps needed to install and run Teleport on Linux machine(s).
Prerequisites
- A Linux machine with ports
3023,3024,3025and3080open. - A domain name, DNS and TLS certificates. We'll provide examples using Let's Encrypt.
- Around 20 minutes to complete; half of this may be waiting for DNS propagation and TLS certificates.
Step 1: Install Teleport on a Linux Host
There are several ways to install Teleport. Take a look at the Teleport Installation page to pick the most convenient for you.
=== "yum repo / AWS Linux 2"
```bash
sudo yum-config-manager --add-repo https://rpm.releases.teleport.dev/teleport.repo
sudo yum install teleport

# Optional:  Using DNF on newer distributions
# sudo dnf config-manager --add-repo https://rpm.releases.teleport.dev/teleport.repo
# sudo dnf install teleport
```
=== "ARM"
=== "ARMv7 (32-bit)"

    ```bash
    curl -O https://get.gravitational.com/teleport-v{{ teleport.version }}-linux-arm-bin.tar.gz
    tar -xzf teleport-v{{ teleport.version }}-linux-arm-bin.tar.gz
    cd teleport
    sudo ./install
    ```

=== "ARM64/ARMv8 (64-bit)"

    ```bash
    curl -O https://get.gravitational.com/teleport-v{{ teleport.version }}-linux-arm64-bin.tar.gz
    tar -xzf teleport-v{{ teleport.version }}-linux-arm64-bin.tar.gz
    cd teleport
    sudo ./install
    Teleport binaries have been copied to /usr/local/bin
    To configure the systemd service for Teleport take a look at examples/systemd/README.md
    ```
=== "Linux Tarball"
```bash
curl -O https://get.gravitational.com/teleport-v{{ teleport.version }}-linux-amd64-bin.tar.gz
tar -xzf teleport-v{{ teleport.version }}-linux-amd64-bin.tar.gz
cd teleport
sudo ./install
Teleport binaries have been copied to /usr/local/bin
To configure the systemd service for Teleport take a look at examples/systemd/README.md
```
Step 1b: Configure Teleport
When setting up Teleport, we recommend running it with Teleport's YAML configuration file.
# Write a basic demo config to teleport.yaml.
$ cat > teleport.yaml <<EOF
teleport:
    data_dir: /var/lib/teleport
auth_service:
    enabled: true
    cluster_name: "teleport-quickstart"
    listen_addr: 0.0.0.0:3025
    tokens:
    - proxy,node,app:f7adb7ccdf04037bcd2b52ec6010fd6f0caec94ba190b765
ssh_service:
    enabled: true
    labels:
        env: staging
app_service:
    enabled: true
    debug_app: true
proxy_service:
    enabled: true
    listen_addr: 0.0.0.0:3023
    web_listen_addr: 0.0.0.0:3080
    tunnel_listen_addr: 0.0.0.0:3024
EOF

# Write teleport.yaml to /etc/teleport.yaml (Teleport's default config location)
$ sudo mv teleport.yaml /etc
Step 1c: Configure Domain Name and obtain TLS certificates using Let's Encrypt
Teleport requires a secure public endpoint for the Teleport UI and for end users to connect to. A domain name and TLS certificates are also required. We'll use Let's Encrypt to obtain a free TLS certificate.
DNS Setup:
For this setup, we'll simply use an A or CNAME record pointing to the IP/FQDN of the machine with Teleport installed.
TLS Setup:
If you already have TLS certificates available you can use those. If using a new domain we recommend using certbot, which is free and
simple to set up. Follow certbot instructions for how to obtain a certificate for your distro.
!!! tip "Using Certbot to obtain Wildcard Certs"
Let's Encrypt provides free wildcard certificates. Below is an example command to
use [certbot](https://certbot.eff.org/) with DNS challenge.
Replace `foo@example.com` with your email address.
Replace `teleport.example.com` with the domain name you want to use to access Teleport.

  ```sh
  certbot certonly \
    --manual \
    --preferred-challenges=dns \
    --agree-tos \
    --manual-public-ip-logging-ok \
    --email foo@example.com \
    -d "teleport.example.com, *.teleport.example.com"
  ```
Update teleport.yaml
Once you've obtained certificates from Let's Encrypt, the below commands will update Teleport's
config file to use your newly configured domain and TLS certificates.
Replace teleport.example.com with the domain name you configured above.
# Replace `teleport.example.com` with your domain name.
export TELEPORT_PUBLIC_DNS_NAME="teleport.example.com"
cat >> /etc/teleport.yaml <<EOF
  public_addr: $TELEPORT_PUBLIC_DNS_NAME:3080
  https_keypairs:
    - key_file: /etc/letsencrypt/live/$TELEPORT_PUBLIC_DNS_NAME/privkey.pem
      cert_file: /etc/letsencrypt/live/$TELEPORT_PUBLIC_DNS_NAME/fullchain.pem
EOF
Once you've updated the config file, assuming you have configured with systemd, you should restart Teleport to pick up the changes:
sudo systemctl restart teleport
Otherwise you can start Teleport directly:
sudo teleport start
You can access Teleport's web UI on port 3080.
Replace teleport.example.com with your domain: https://teleport.example.com:3080/
!!! success
Teleport is now up and running.
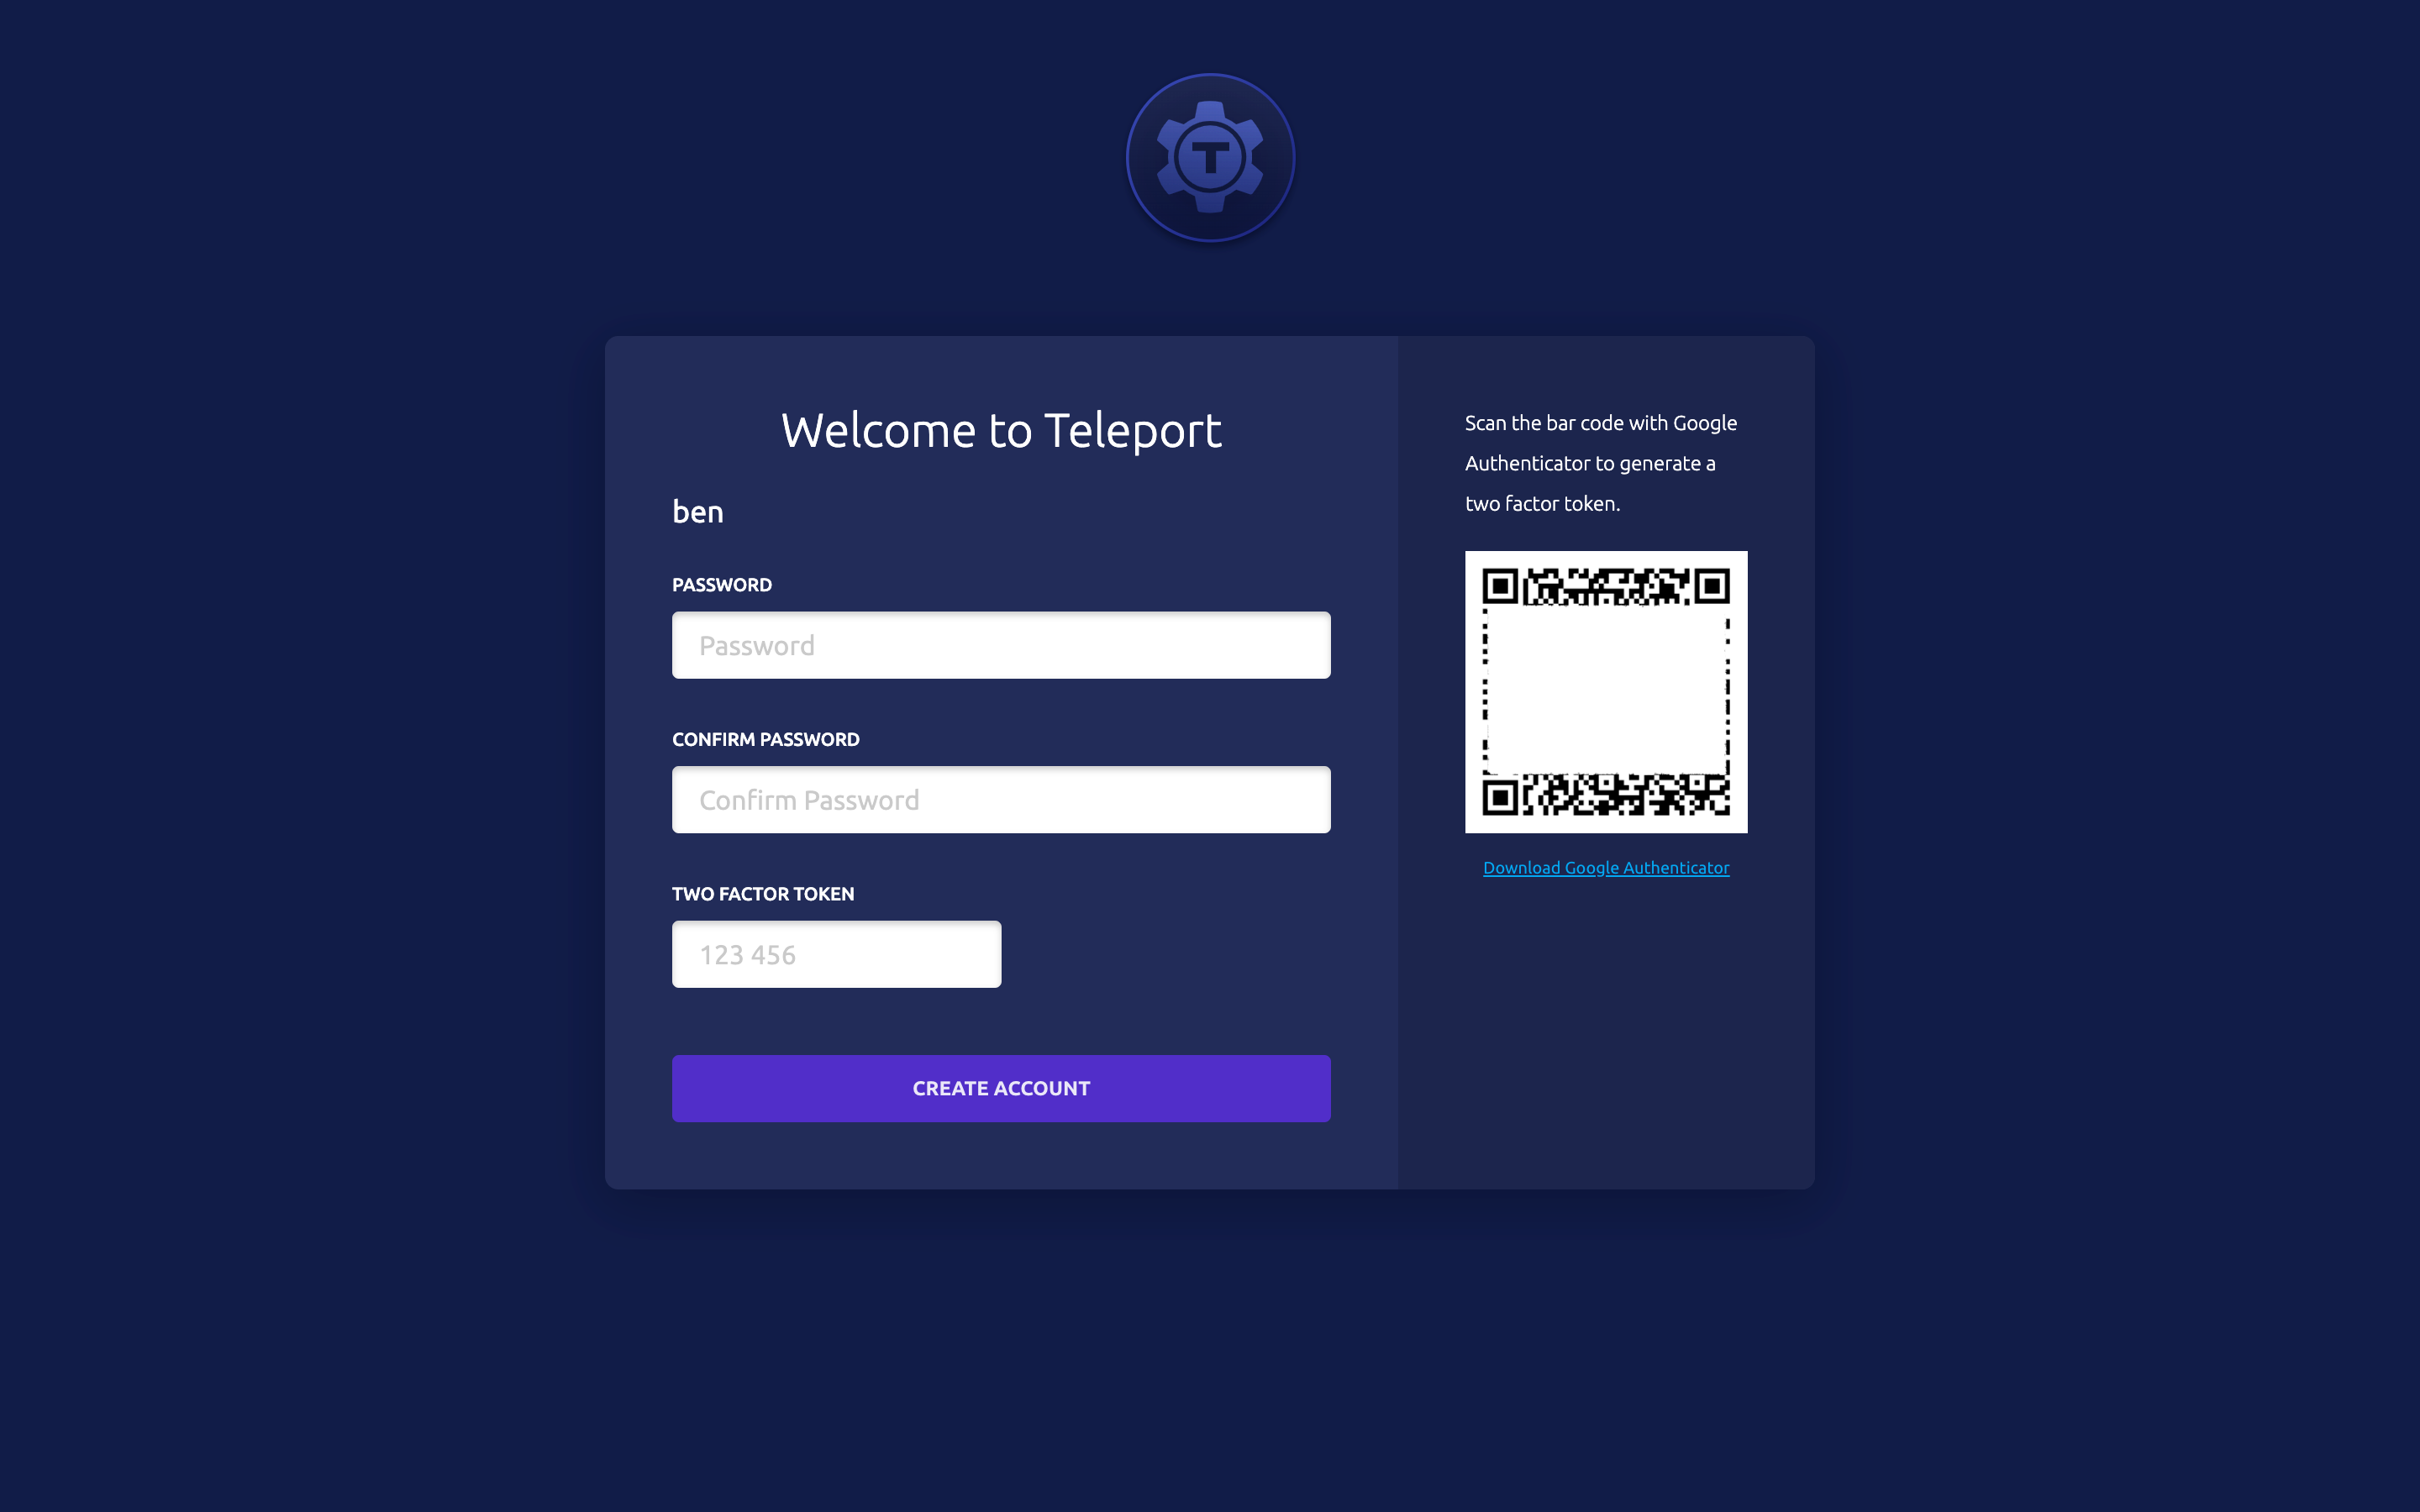
Step 2: Create a Teleport user and set up 2-factor authentication
In this example, we'll create a new Teleport user teleport-admin which is allowed to log into
SSH hosts as any of the principals root, ubuntu or ec2-user.
# tctl is an administrative tool that is used to configure Teleport's auth service.
sudo tctl users add teleport-admin root,ubuntu,ec2-user
Teleport will always enforce the use of 2-factor authentication by default. It supports one-time passwords (OTP) and hardware tokens (U2F). This quick start will use OTP - you'll need an OTP-compatible app which can scan a QR code.
Here's a selection of compatible Two-Factor authentication apps:
!!! info "OS User Mappings"
The OS users that you specify (`root`, `ubuntu` and `ec2-user` in our examples) must exist!
On Linux, if a user does not already exist, you can create it with `adduser <login>`. If you
do not have the permission to create new users on the Linux host, run `tctl users add teleport
$(whoami)` to explicitly allow Teleport to authenticate as the user that you are currently logged
in as. If you do not map to an existing OS user,  you will get authentication errors later on in
this tutorial!
Step 2a: Install a Teleport client locally
=== "Mac"
[Download MacOS .pkg installer](https://goteleport.com/teleport/download?os=macos) (tsh client only, signed) file, double-click to run the installer.
=== "Mac - Homebrew"
```bash
$ brew install teleport
```

!!! note
    The Teleport package in Homebrew is not maintained by Teleport. We recommend the use of our [own Teleport packages](https://goteleport.com/teleport/download?os=macos).
=== "Windows - Powershell"
```bash
curl -O teleport-v{{ teleport.version }}-windows-amd64-bin.zip https://get.gravitational.com/teleport-v{{ teleport.version }}-windows-amd64-bin.zip
# Unzip the archive and move `tsh.exe` to your %PATH%
```
=== "Linux"
For more options (including RPM/DEB packages and downloads for i386/ARM/ARM64) please see our [installation page](installation.md).

```bash
curl -O https://get.gravitational.com/teleport-v{{ teleport.version }}-linux-amd64-bin.tar.gz
tar -xzf teleport-v{{ teleport.version }}-linux-amd64-bin.tar.gz
cd teleport
sudo ./install
Teleport binaries have been copied to /usr/local/bin
To configure the systemd service for Teleport take a look at examples/systemd/README.md
```
Step 3: Log in using tsh
tsh is our client tool. It helps you log into Teleport clusters and obtain short-lived credentials. It can also be used to
list servers, applications and Kubernetes clusters registered with Teleport.
Prior to launch you must authenticate.
=== "Local Cluster - tsh"
```
# Replace teleport.example.com:3080 with your Teleport cluster's public address as configured above.
tsh login --proxy=teleport.example.com:3080 --user=teleport-admin
```
Step 4: Have Fun with Teleport!
View Status
=== "tsh status"
```bash
tsh status
```
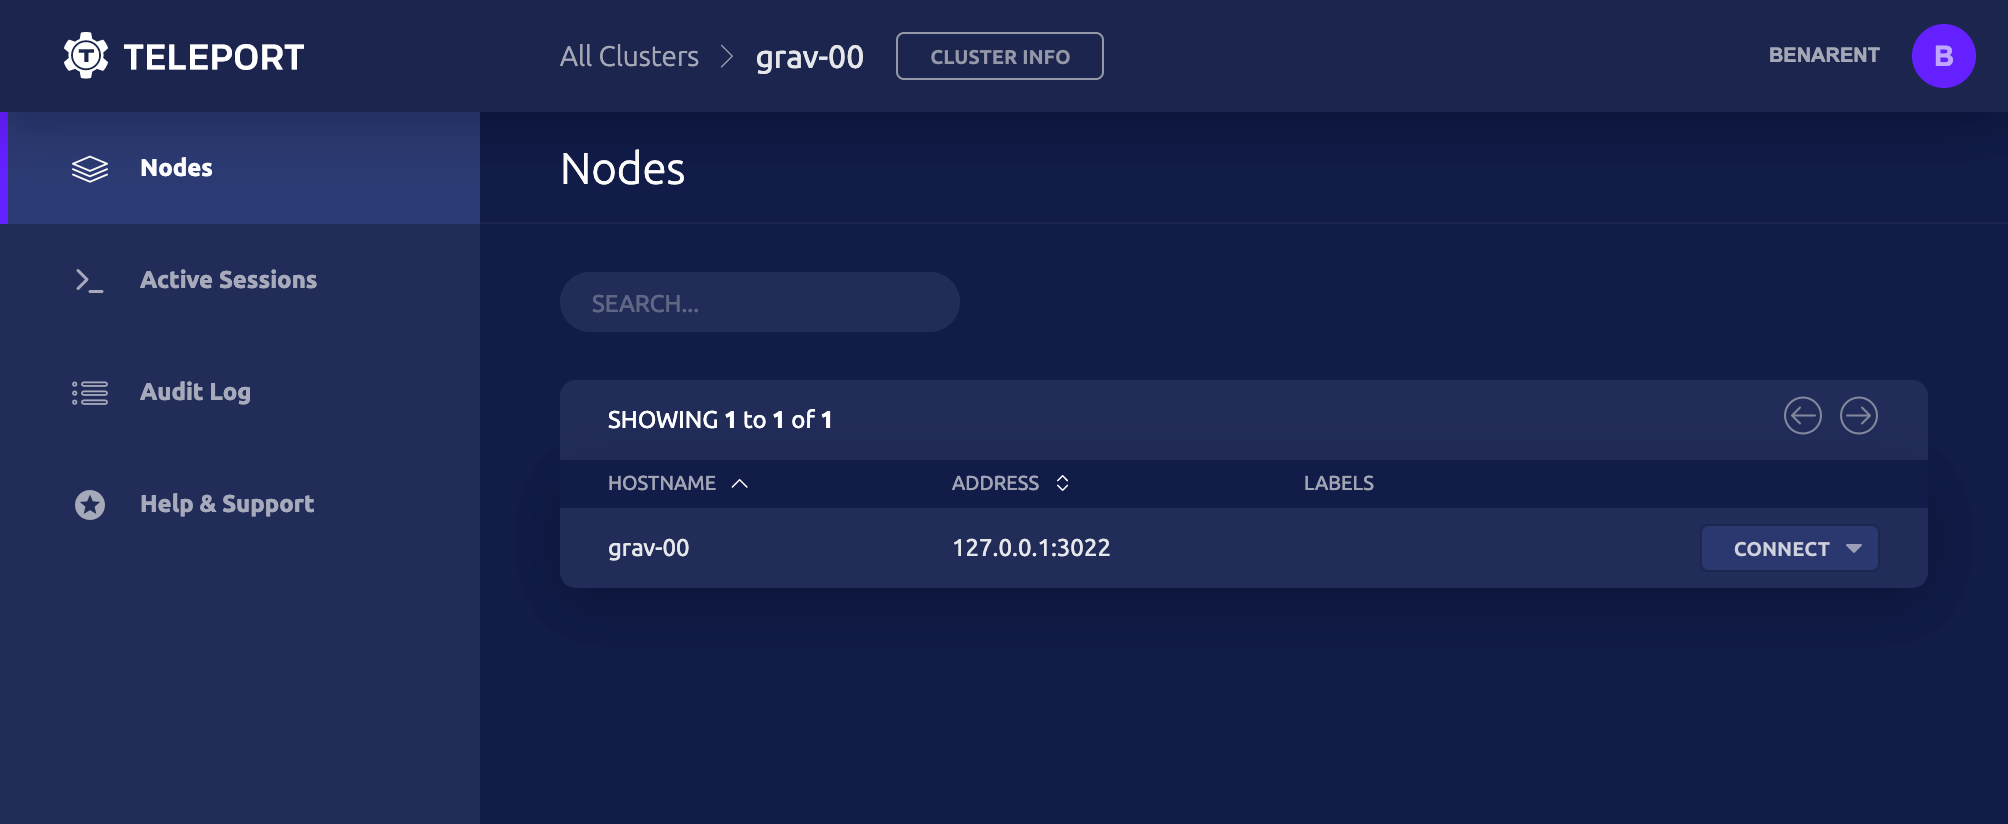
SSH into a node
=== "tsh ls & ssh"
```
# list all SSH servers connected to Teleport
tsh ls

# ssh into `node-name` as `root`
tsh ssh root@node-name
```
Add a Node to the Cluster
When you set up Teleport earlier, we configured a strong static token for nodes and apps.
We've used a static token to make set up easier for this example, but you can also
obtain short-lived dynamic tokens using tctl as shown below.
=== "Example Static Token"
```yaml
#...
#    tokens:
#    - node:f7adb7ccdf04037bcd2b52ec6010fd6f0caec94ba190b765
#...
```
=== "Example Dynamic Token"
```bash
sudo tctl tokens add --type=node
```
Armed with these details, we'll bootstrap a new host using
=== "teleport start"
Install Teleport on the target node, then start it using a command as shown below:

```bash
sudo teleport start \
--roles=node \
--auth-server=https://teleport.example.com:3080 \
--token=f7adb7ccdf04037bcd2b52ec6010fd6f0caec94ba190b765 \
--labels=env=quickstart
```
=== "cloud-config"
Replace `auth_servers` with the hostname and port of your Teleport cluster as configured above.

```ini
#cloud-config

package_upgrade: true

write_files:
- path: /etc/teleport.yaml
    content: |
        teleport:
            auth_token: "f7adb7ccdf04037bcd2b52ec6010fd6f0caec94ba190b765"
            auth_servers:
                - "https://teleport.example.com:3080"
        auth_service:
            enabled: false
        proxy_service:
            enabled: false
        ssh_service:
            enabled: true
            labels:
                env: quickstart

runcmd:
- 'mkdir -p /tmp/teleport'
- 'cd /tmp/teleport && curl -O https://get.gravitational.com/teleport_{{ teleport.version }}_amd64.deb'
- 'dpkg -i /tmp/teleport/teleport_5.0.0-{{ teleport.version }}_amd64.deb'
- 'systemctl enable teleport.service'
- 'systemctl start teleport.service'
```
Add an Application to your Teleport cluster
When you set up Teleport earlier, we configured a strong static token for nodes and apps.
We've used a static token to make set up easier for this example, but you can also
obtain short-lived dynamic tokens using tctl as shown below.
=== "Example Static Token"
```yaml
#...
#    tokens:
#    - app:f7adb7ccdf04037bcd2b52ec6010fd6f0caec94ba190b765
#...
```
=== "Example Dynamic Token"
```bash
sudo tctl tokens add --type=app
```
Armed with these details, we'll bootstrap a new host using
=== "teleport start"
Install Teleport on the target node, then start it using a command as shown below.
Review and update `auth-server`, `app-name` and `app-uri` before running this command.

```bash
sudo teleport start \
--roles=app \
--token=f7adb7ccdf04037bcd2b52ec6010fd6f0caec94ba190b765 \
--auth-server=teleport.example.com:3080 \
--app-name=example-app  \ # Change "example-app" to the name of your application.
--app-uri=http://localhost:8080  # Change "http://localhost:8080" to the address of your application.
```
Next Steps
Congratulations! You've completed the Teleport Quickstart.
In this guide, you've learned how to install Teleport on a single node and seen a few of the most useful features in action. When you're ready to learn how to set up Teleport for your team, we recommend that you read our Admin Guide to get all the important details. This guide will lay out everything you need to safely run Teleport in production, including SSL certificates, security considerations, and YAML configuration.
Guides
If you like to learn by doing, check out our collection of step-by-step guides for common Teleport tasks.