12 KiB
SAML 2.0 Features
Teleport Enterprise supports SAML 2.0 as an external identity provider and has been tested to work with Okta and Active Directory Federation Services (ADFS) 2016.
Okta
This guide configures Okta map groups via SAML to Teleport roles.
Start Teleport
Start Teleport with this samle config, notice how we set dynamic_config: true to indicate that we will use dynamic configuration
as opposed to static file config.
# Simple config file with just a few customizations (with comments)
teleport:
  nodename: localhost
  log:
    output: stderr
    severity: DEBUG
  dynamic_config: true
auth_service:
  enabled: yes
  cluster_name: teleport.local
ssh_service:
  enabled: yes
Configure Okta
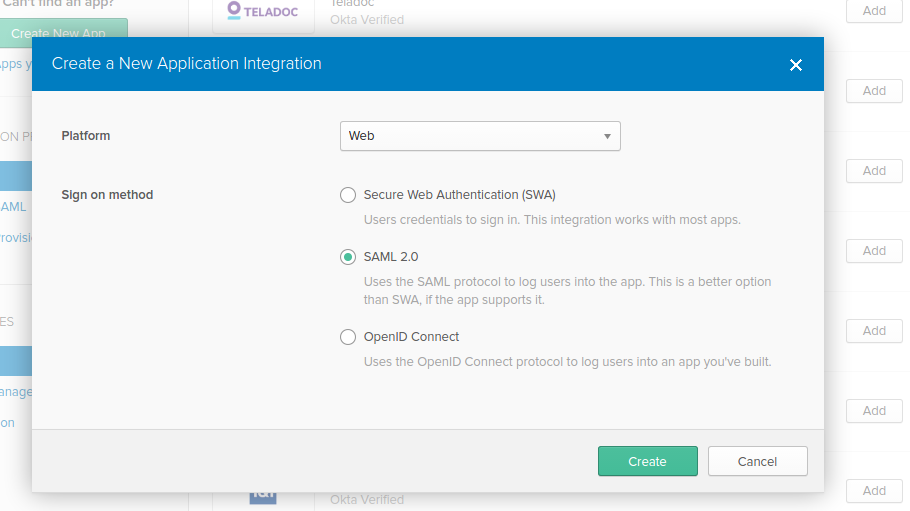
Create App
Create SAML 2.0 Web App in Okta config section
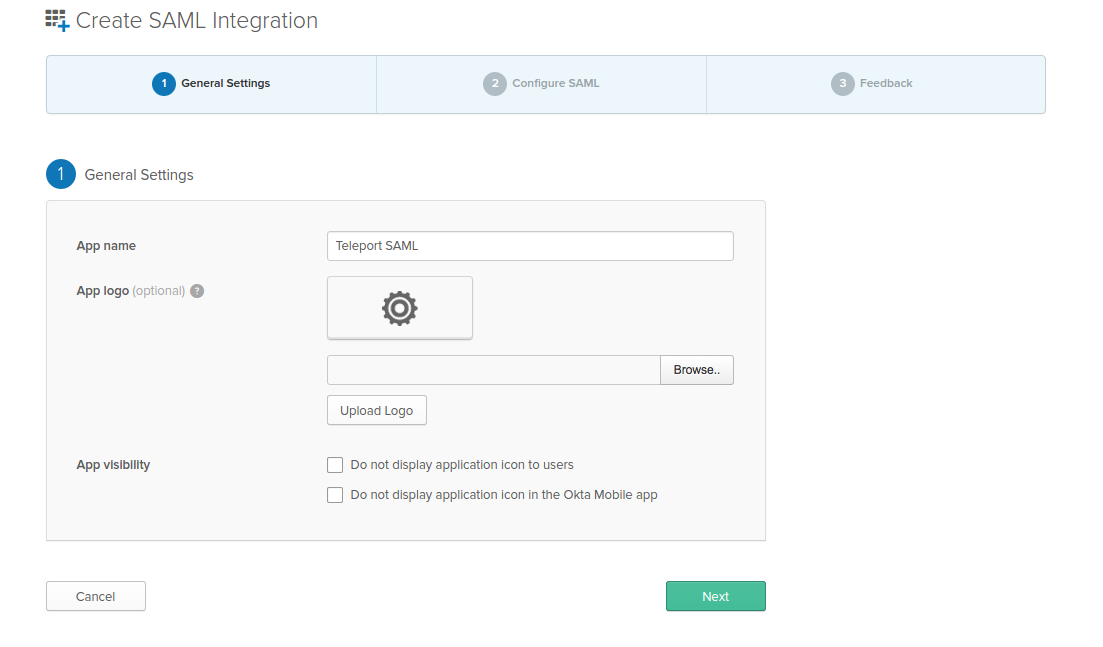
Configure Okta App
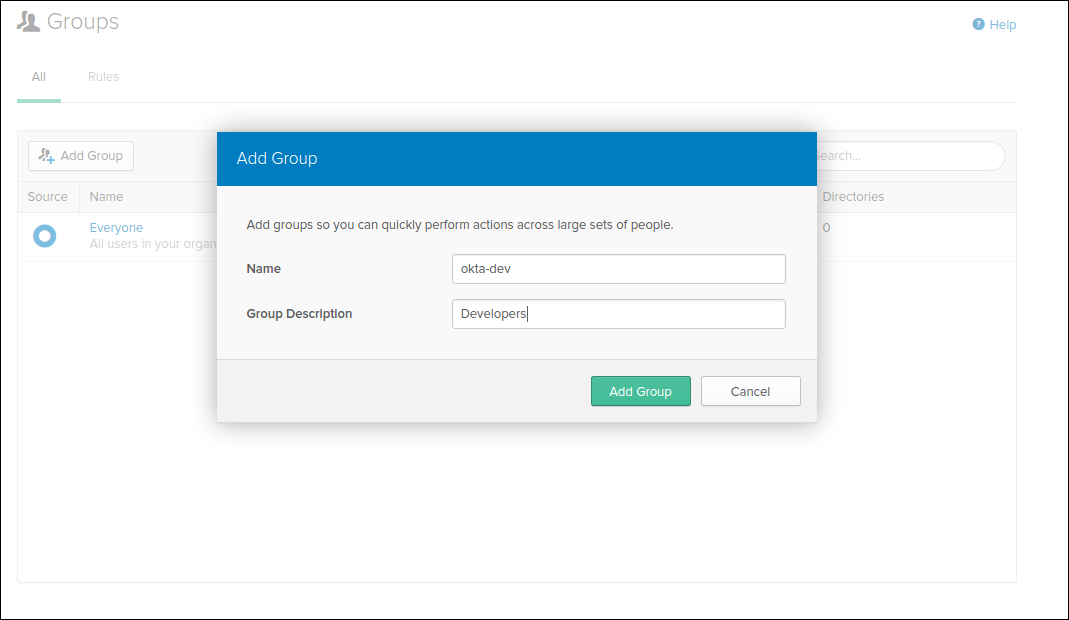
Create Groups
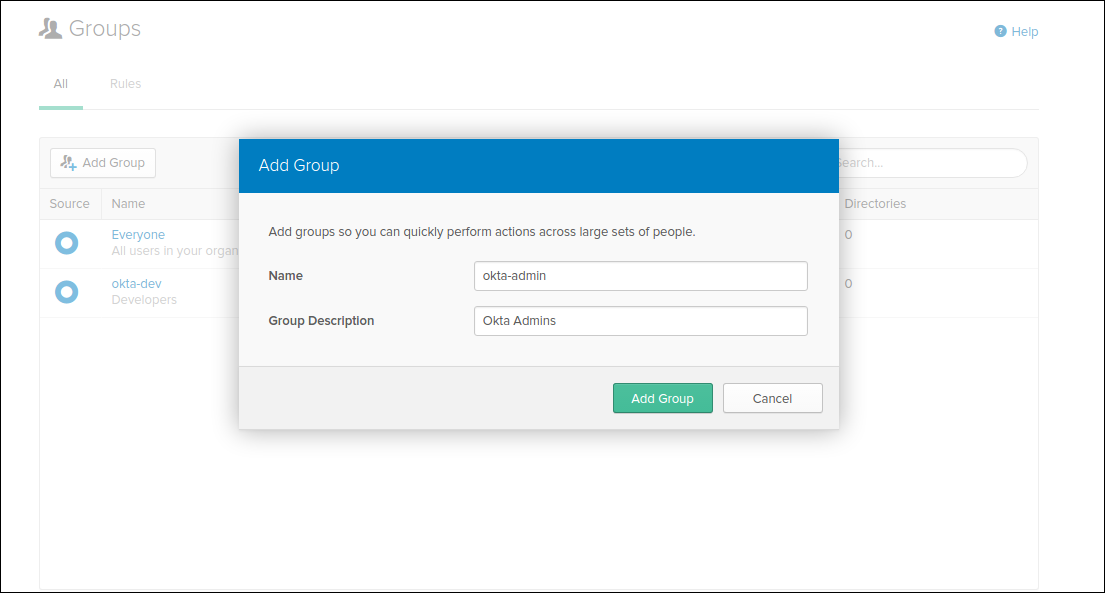
We are going to create groups okta-dev and okta-admin:
Devs
Admins
Configure APP
We are going to map these Okta groups to SAML Attribute statements (special signed metadata exposed via SAML XML response).

Notice: We have set NameID to email format and mappped groups with wildcard regex in Group Attribute statements. We have also set Audience and SSO url to be the same thing.
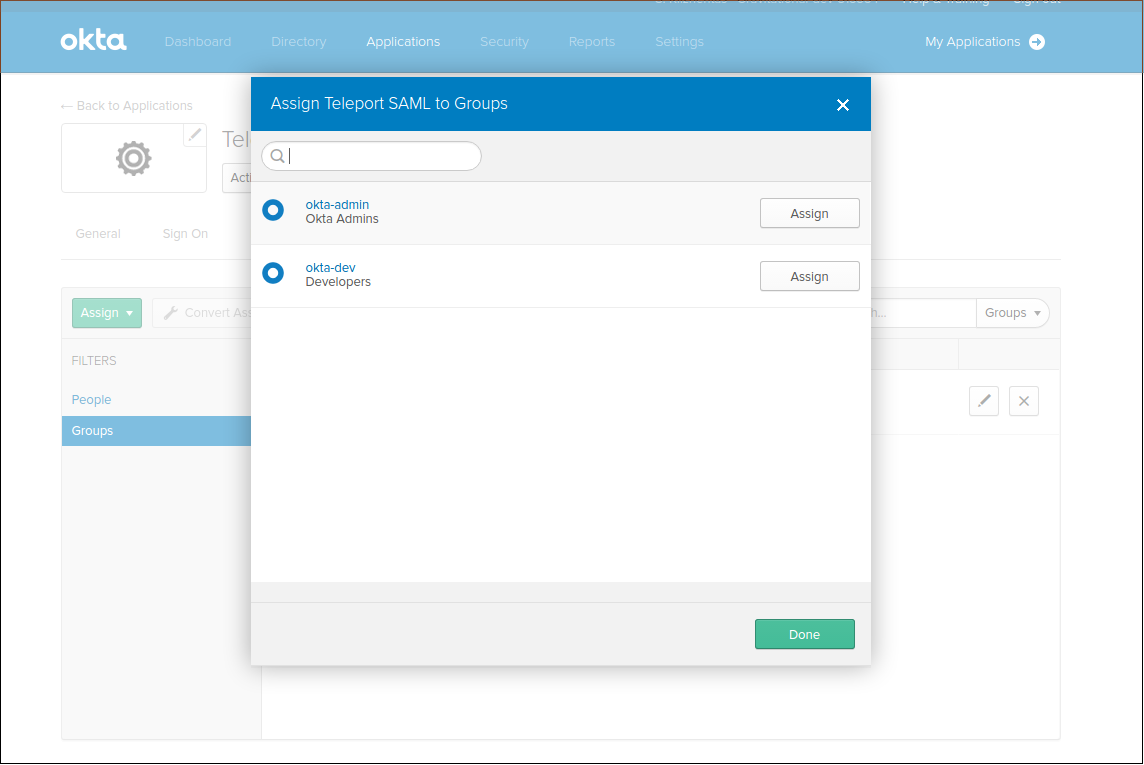
Assign Groups
Assign groups and people to your SAML app:
Configure Teleport SAML
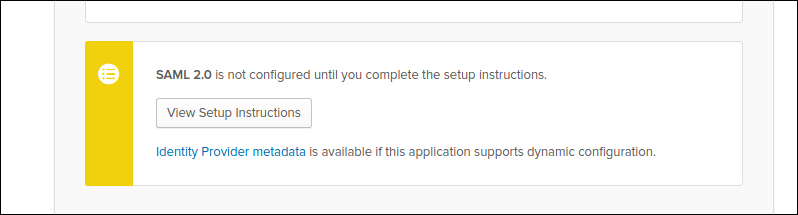
Download metadata in the form of XML doc, we will use it to configure Teleport.
kind: saml
version: v2
metadata:
  name: OktaSAML
spec:
  acs: https://localhost:3080/v1/webapi/saml/acs
  attributes_to_roles:
    - {name: "groups", value: "okta-admin", roles: ["admin"]}
    - {name: "groups", value: "okta-dev", roles: ["dev"]}
  entity_descriptor: |
    <paste SAML XML contents here>
Configure the SAML by creating configuration resource in teleport using tctl command:
tctl create -f saml.yaml
Create file preference.yaml that will configure teleport to use SAML as primary configuration method:
kind: cluster_auth_preference
version: v2
metadata:
  name: "cluster-auth-preference"
spec:
  type: saml
tctl create -f preference.yaml
Create Teleport Roles
We are going to create 2 roles, privileged role admin who is able to login as root and is capable of administrating the cluster and non-privileged dev who is only allowed to view sessions and login as non-privileged user.
kind: role
version: v2
metadata:
  name: admin
  namespace: default
spec:
  logins: [root]
  max_session_ttl: 90h0m0s
  namespaces: ['*']
  node_labels:
    '*': '*'
  resources:
    '*': [read, write]
Devs are only allowed to login to nodes labelled with access: relaxed teleport label.
kind: role
version: v2
metadata:
  name: stage-devops
spec:
  logins: [ubuntu]
  max_session_ttl: 90h0m0s
  namespaces: ['*']
  node_labels:
    access: relaxed
  resources:
    '*': [read]
Notice: Replace ubuntu with linux login available on your servers!
tctl create -f admin.yaml
tctl create -f dev.yaml
Login
For the Web UI, if the above configuration were real, you would see a button
that says Login with Okta. Simply click on that and you will be
re-directed to a login page for your identity provider and if successful,
redirected back to Teleport.
For console login, you simple type tsh --proxy <proxy-addr> ssh <server-addr>
and a browser window should automatically open taking you to the login page for
your identity provider. tsh will also output a link the login page of the
identity provider if you are not automatically redirected.
!!! note "IMPORTANT": Teleport only supports sending party initiated flows for SAML 2.0. This means you can not initiate login from your identity provider, you have to initiate login from either the Teleport Web UI or CLI.
ADFS
ADFS Configuration
You'll need to configure ADFS to export claims about a user (Claims Provider Trust in ADFS terminology) and you'll need to configure AD FS to trust Teleport (a Relying Party Trust in ADFS terminology).
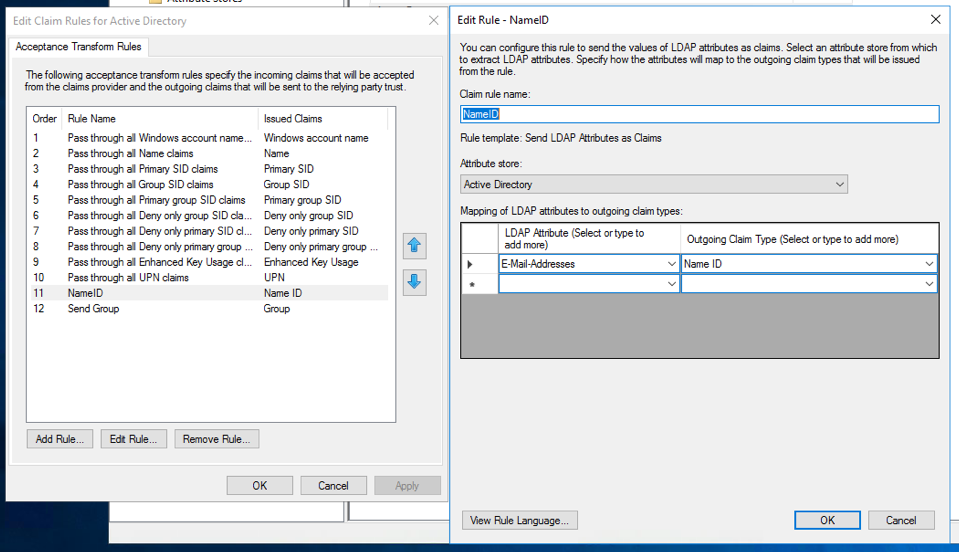
For Claims Provider Trust configuration you'll need to specify at least the
following two incoming claims: Name ID and Group. Name ID should be a
mapping of the LDAP Attribute E-Mail-Addresses to Name ID. A group
membership claim should be used to map users to roles (for example to
separate normal users and admins).
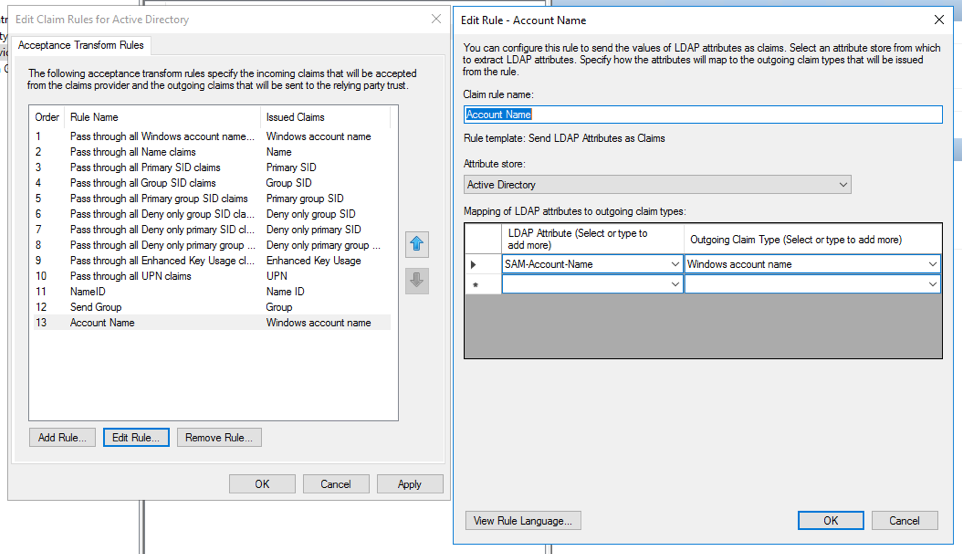
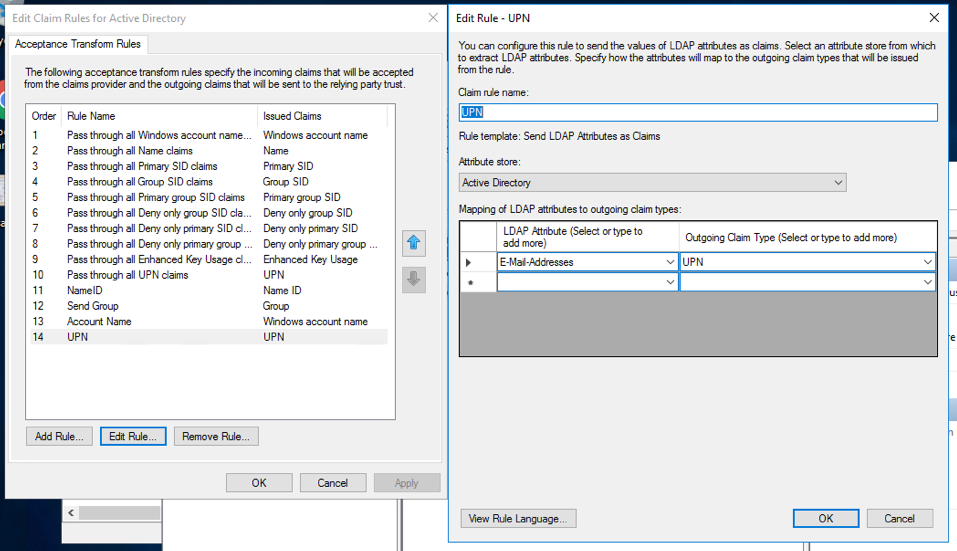
In addition if you are using dynamic roles (see below), it may be useful to map
the LDAP Attribute SAM-Account-Name to Windows account name and create
another mapping of E-Mail-Addresses to UPN.
You'll also need to create a Relying Party Trust, use the below information to
help guide you through the Wizard. Note, for development purposes we recommend
using https://localhost:3080/v1/webapi/saml/acs as the Assertion Consumer
Service (ACS) URL, but for production you'll want to change this to a domain
that can be accessed by other users as well.
- Create a claims aware trust.
- Enter data about the relying party manually.
- Set the display name to something along the lines of "Teleport".
- Skip the token encryption certificate.
- Select
Enable support for SAML 2.0 Web SSO protocoland set the URL tohttps://localhost:3080/v1/webapi/saml/acs. - Set the relying party trust identifier to
https://localhost:3080/v1/webapi/saml/acsas well. - For access control policy select
Permit everyone.
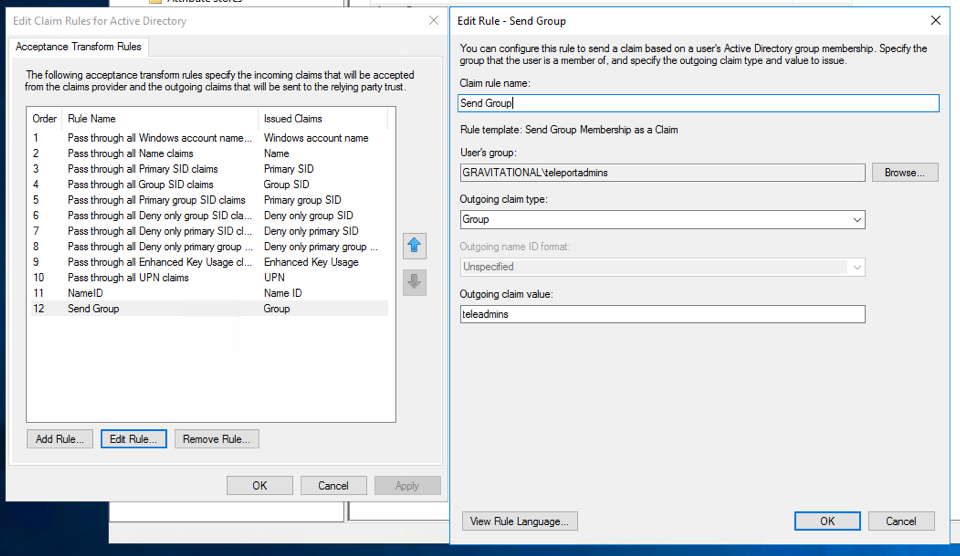
Once the Relying Party Trust has been created, update the Claim Issuance Policy
for it. Like before make sure you send at least Name ID and Group claims to the
relying party (Teleport). If you are using dynamic roles, it may be useful to
map the LDAP Attribute SAM-Account-Name to Windows account name and create
another mapping of E-Mail-Addresses to UPN.
Lastly, ensure the user you create in Active Directory has an email address
associated with it. To check this open Server Manager then
Tools -> Active Directory Users and Computers and select the user and right
click and open properties. Make sure the email address field is filled out.
Teleport Configuration
Teleport can be configured with static or dynamic roles. Static roles are simple and great when the role you need to associate with a user is static. If the role your user assumes depends on the attributes that you send along, consider using dynamic roles.
Static Roles
To configure Teleport with static roles, first you'll need to create at least
the following two roles. One is for an admins and the other is for a normal
users. You can create them on the backend using tctl create -f {file name}.
kind: role
version: v2
metadata:
   name: "admins"
   namespace: "default"
spec:
   namespaces: [ "*" ]
   max_session_ttl: 90h0m0s
   logins: [ root ]
   node_labels:
      "*": "*"
   resources:
      "*": [ "read", "write" ]
kind: role
version: v2
metadata:
   name: "users"
   namespace: "default"
spec:
   max_session_ttl: 90h0m0s
   logins: [ root, jsmith ]
Next create a SAML resource, once again you can do this with tctl create -f {file name}.
kind: saml
version: v2
metadata:
  name: "adfs"
  namespace: "default"
spec:
  provider: "adfs"
  acs: "https://localhost:3080/v1/webapi/saml/acs"
  entity_descriptor_url: "https://adfs.example.com/FederationMetadata/2007-06/FederationMetadata.xml"
  attributes_to_roles:
    - name: "http://schemas.xmlsoap.org/claims/Group"
      value: "teleadmins"
      roles: ["admins"]
    - name: "http://schemas.xmlsoap.org/claims/Group"
      value: "teleusers"
      roles: ["users"]
The acs field should match the value you set in ADFS earlier and you can
obtain the entity_descriptor_url from ADFS under
AD FS -> Service -> Endpoints -> Metadata.
The attributes_to_roles is used to map attributes to the Teleport roles you
just creataed. In our situation, we are mapping the Group attribute whose full
name is http://schemas.xmlsoap.org/claims/Group with a value of teleadmins
to the admin role. Groups with the value teleusers is being mapped to the
users role.
Dynamic Roles
Static roles are simple to understand and use, but can be cumbersome in certain situation. For example if every user has a seperate login stead of a shared login, you have to create/remote a new role every time someone joins (or leaves) the company. In this situation you can use role templates to dynamically create roles based off information passed in the assertions.
kind: saml
version: v2
metadata:
  name: "adfs"
  namespace: "default"
spec:
  provider: "adfs"
  acs: "https://localhost:3080/v1/webapi/saml/acs"
  entity_descriptor_url: "https://adfs.example.com/FederationMetadata/2007-06/FederationMetadata.xml"
  attributes_to_roles:
     - name: "http://schemas.xmlsoap.org/claims/Group"
       value: "teleadmins"
       role_template:
          kind: role
          version: v2
          metadata:
             name: '{{index . "http://schemas.xmlsoap.org/ws/2005/05/identity/claims/upn"}}'
             namespace: "default"
          spec:
             namespaces: [ "*" ]
             max_session_ttl: 90h0m0s
             logins: [ '{{index . "http://schemas.microsoft.com/ws/2008/06/identity/claims/windowsaccountname"}}', root ]
             node_labels:
                "*": "*"
             resources:
                "*": [ "read", "write" ]
     - name: "http://schemas.xmlsoap.org/claims/Group"
       value: "teleusers"
       role_template:
          kind: role
          version: v2
          metadata:
             name: '{{index . "http://schemas.xmlsoap.org/ws/2005/05/identity/claims/upn"}}'
             namespace: "default"
          spec:
             max_session_ttl: 90h0m0s
             logins: [ '{{index . "http://schemas.microsoft.com/ws/2008/06/identity/claims/windowsaccountname"}}', root ]
The attributes_to_roles field is the same as static roles except instead of
roles we have role_template which defines the role to be created when the
user successfully logs in. Note that the login and role name are extracted from
the additional assertions we created above and injected into the role.
The last resource you'll need to configure for Teleport is your cluster
authentication preferences. Once again create the below resource with
tctl create -f {file name}.
kind: cluster_auth_preference
version: v2
metadata:
  description: ""
  name: "cluster-auth-preference"
  namespace: "default"
spec:
  type: saml
Exporting Signing Key
For the last step, you'll need to export the signing key, you can do this with
tctl saml export --name adfs. Save the output to a file named saml.crt.
Return back to AD FS and open the Relying Party Trust and add this file as one
of the signature verification certificates.
Login
For the Web UI, if the above configuration were real, you would see a button
that says Login with adfs. Simply click on that and you will be
re-directed to a login page for your identity provider and if successful,
redirected back to Teleport.
For console login, you simple type tsh --proxy <proxy-addr> ssh <server-addr>
and a browser window should automatically open taking you to the login page for
your identity provider. tsh will also output a link the login page of the
identity provider if you are not automatically redirected.